
Picking
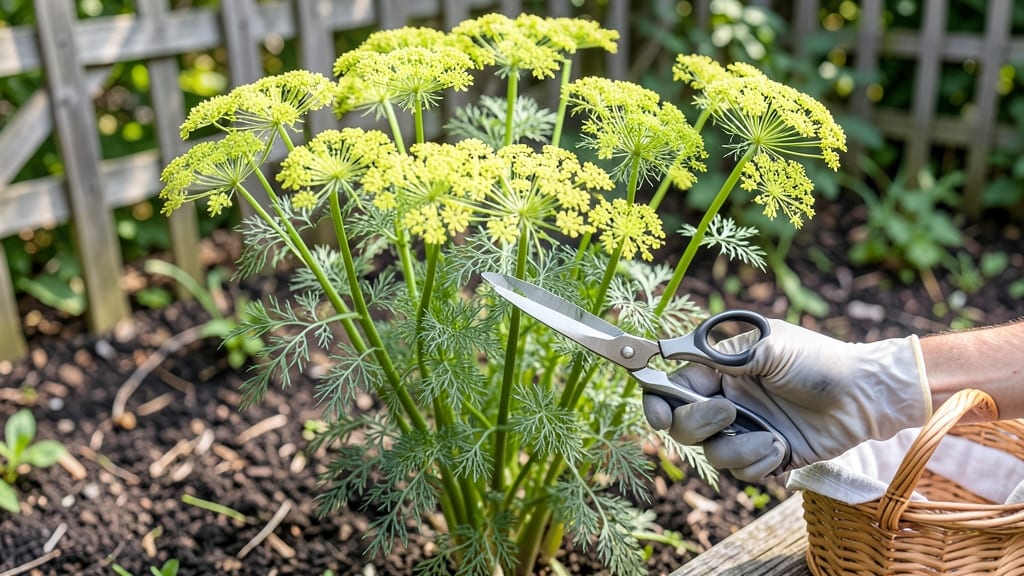
Harvesting dill at the right time ensures bold, aromatic flavor 🌿—whether you’re snipping fresh leaves or waiting for those prized seed pods to crack open.
Knowing the exact dill harvest time can mean the difference between fresh, vibrant flavor and bitter, overripe disappointment—especially when those prized seed pods finally crack open.
For leaves, aim for 45-60 days after planting, when stems are sturdy and leaves burst with fragrance. But if you’re after seeds, wait until the pods turn golden and split—usually 60-90 days in.
Below, I’ll walk you through the best methods for harvesting leaves (cut-and-come-again) and seeds (when to let those pods burst), plus storage tips to keep your harvest fresh for months.

When to harvest dill for fresh leaves vs. seed pods
Timing your dill harvest correctly ensures you capture the peak flavor whether you're after tender fresh leaves or aromatic seed pods. The difference between a vibrant harvest and a bitter disappointment often comes down to days after planting and visual cues like flower clusters or seed pod development.
For leaf harvests, I've found the sweet spot occurs between 30-50 days after planting when the plant reaches 12-18 inches tall. This window gives you the most aromatic foliage before the plant diverts energy to flowering.
Waiting too long means tougher stems and diminished flavor as the plant prepares for reproduction.
Seed pods, on the other hand, require more patience. They reach maturity between 60-90 days, but timing is everything. Harvest too early, and the seeds won't be fully developed. Wait too long, and the pods will crack open releasing seeds prematurely.
The key is watching for those yellow-green flower clusters to form first, then waiting for the pods to turn brown before harvesting.
Here's a quick comparison to help you visualize the differences:
| Harvest Type | Days After Planting | Plant Height | Visual Cues | Best For |
|---|---|---|---|---|
| Fresh Leaves | 30-50 days | 12-18 inches | Lush green foliage, firm stems | Cooking, garnishes |
| Seed Pods | 60-90 days | 24-36 inches | Brown seed pods, yellow flowers | Pickling, seasoning |
The leaf harvest window is your best bet for culinary use because the leaves contain the highest concentration of essential oils that give dill its signature flavor. I recommend harvesting in the morning after the dew has dried but before the heat of the day sets in.
This preserves the oil content and makes the leaves more aromatic.
For seed pods, the flowering stage is your first clue. When you see those delicate yellow umbel flowers appear, count about 2-3 weeks until the pods mature. The pods should turn from green to brownish-yellow and feel firm to the touch.
If you hear a cracking sound, that's your signal to harvest immediately before the seeds scatter.
One common mistake I see is harvesting dill leaves after flowering. Once those flowers appear, the plant's energy shifts from leaf production to seed development. The leaves become bitter and tough, which is why I always recommend harvesting leaves before flowering for the best flavor.
You can actually encourage more leaf growth by pinching off the flower buds as they form.
If you're growing dill for both leaves and seeds, consider planting in successive batches. This way, you can harvest leaves from the first planting while allowing the second planting to mature for seeds.
It's a great strategy for extending your harvest season and ensuring you have both fresh leaves and seed pods available throughout the growing season.
Remember that environmental conditions also play a role in harvest timing. Dill grown in cooler climates may take longer to mature than plants in warmer regions. Always monitor your plants closely and adjust your harvest timing based on what you observe in your specific growing conditions.
Finally, don't forget that proper storage techniques can extend the life of your harvest. Fresh dill leaves can be stored in the refrigerator for up to a week, while seed pods should be dried completely before storage to prevent mold growth.
With the right timing and care, you'll have a bountiful dill harvest that enhances your cooking all season long.
Step-by-step guide to harvesting dill at the right time
Harvesting dill at the perfect moment ensures maximum flavor and yield. For fresh leaves, timing is everything—typically 30 to 50 days after planting when stems reach 12-18 inches tall.
If you're after dill seeds, wait until the seed pods turn brown and begin cracking, usually around 60 to 90 days. Both methods require the right tools and techniques to preserve that signature anise-like aroma.
Start by gathering your harvesting tools: a sharp pair of pruning shears, a clean knife, and a paper bag for seeds. Avoid using dull tools, as they can crush stems and damage the plant.
Work on a dry, sunny morning when the essential oils are most concentrated. This timing also minimizes stress on the plant, encouraging more growth.
- Identify mature leaves: Look for fully developed leaves at the top of stems, typically 12-18 inches tall.
- Use the cut-and-come-again method: Snip stems 2-3 inches above ground to encourage regrowth.
- Avoid over-harvesting: Never remove more than one-third of the plant at once to maintain health.
- Wait for seed pods to mature: Pods should turn brown and split open naturally.
- Collect seeds before scattering: Gently rub pods over a paper bag to catch seeds.
- Store seeds in a cool, dry place: Use an airtight container to preserve viability for up to 2 years.
- For fresh leaves: Wrap in a damp paper towel and store in the fridge for 5-7 days.
- For drying leaves: Bundle stems and hang upside down in a dark, dry place for 1-2 weeks.
- For seed storage: Keep in a cool, dark place to maintain freshness and germination.
After harvesting, rinse leaves gently under cool water to remove dirt but avoid soaking, which can dilute flavors. Pat dry with a paper towel before storing. For seeds, ensure they’re completely dry before storing to prevent mold.
If you miss the seed harvest window, don’t worry—you can still save seeds from dried pods later, though flavor may be slightly less potent.
Pro tip: Freeze dill leaves in ice cube trays with water or olive oil for easy use in cooking. This method locks in flavor and makes it convenient for future recipes. Always label your stored dill with the harvest date to track freshness.
With these steps, you’ll enjoy homegrown dill at its peak flavor, whether you’re using it for pickling cucumbers, garnishing soups, or saving seeds for next year’s garden. Happy harvesting! 🌿✂️🌱