
How To
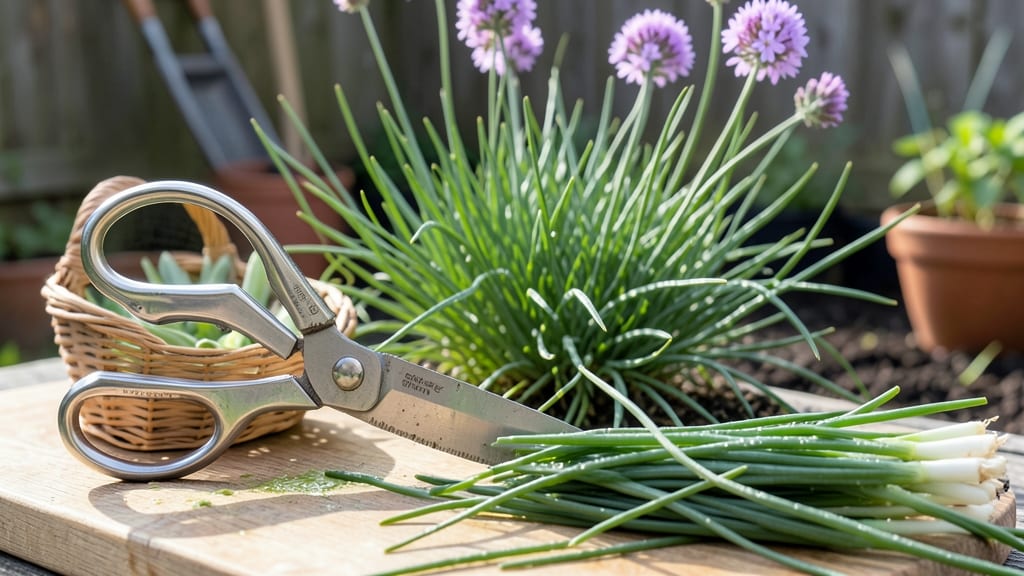
Harvesting chives at 8 inches unlocks their boldest flavor, and doing it right keeps your plants producing all season long.
Picture this: you’ve waited months for your chives 🌿 to grow, only to snip them too early—or worse, let them bolt into flower stalks. That’s when the flavor fades, and your culinary plans go up in smoke.
Timing is everything, but so is technique. Cutting too close to the base stunts regrowth, while letting them get leggy means weaker stems. Below, I’ll show you the exact method to snip for peak flavor without sacrificing future harvests.
You’ll also learn how to store your harvest for fresh use later, whether you’re drying bundles for winter soups or freezing them in ice cubes for instant garnishes.
When and how to harvest chives for maximum flavor
Harvesting chives at the perfect moment transforms them from pretty garden accents to flavor-packed culinary stars. The key? Waiting until they reach 8 inches tall—this is when their onion-like flavor peaks and their leaves are most vibrant.
Cutting too early means milder taste, while waiting too long risks flowering, which diverts energy from leaf production and dulls flavor. Understanding this growth science ensures you get the most from every harvest.
Timing your harvest correctly isn’t just about height—it’s also about seasonal cues. Chives grow best in cool spring and fall temperatures, making these ideal harvest windows. In warmer months, they may bolt (send up flower stalks) faster, so harvest more frequently to keep them producing lush, flavorful leaves.
The goal is to balance harvests with regrowth so your chives stay productive all season.
Visual readiness cues make harvesting chives a breeze. Look for dense, upright stalks with vibrant green leaves that feel crisp to the touch. Avoid harvesting when leaves are yellowing or floppy, as this signals stress or over-maturity. Flower buds? That’s your last call—harvest immediately before they form to preserve flavor and encourage more leaf growth.
| Harvest Stage | Key Characteristics | Action Required |
|---|---|---|
| Early Growth | Stalks <6 inches, sparse leaves | Avoid harvesting; let grow |
| Peak Harvest | Stalks 6-8 inches, dark green, crisp | Cut 1/3 of stalks at base |
| Late Stage | Flower buds visible, leaves soft | Harvest immediately; remove flowers |
| Post-Harvest | Stalks <4 inches, wilted | Trim dead leaves; fertilize lightly |
The cutting technique is just as important as timing. Always use clean, sharp scissors or pruners to snip chives 1-2 inches above the base. This encourages new growth from the root while leaving enough foliage to photosynthesize.
Never pull or yank the stalks—this damages the plant and slows regrowth. For continuous harvests, aim to cut one-third of the stalks every 2-3 weeks during peak growing months.
Seasonal timing directly impacts your chive harvests. In spring, start harvesting once temperatures stabilize above 50°F (10°C), typically 4-6 weeks after planting. Summer harvests should be more frequent to prevent bolting, while fall harvests can continue until first frost. In mild climates, chives may produce year-round, but flavor peaks in cooler months. Plan your harvests to align with these natural cycles for the best results.
Harvesting chives before flowering is critical for flavor and regrowth. When chives bolt, their energy shifts from leaf production to seed development, resulting in bitter, tough leaves. To prevent bolting, harvest aggressively in late spring and early summer, removing any flower stalks as soon as they appear.
This redirects energy back into leaf growth, keeping your chives productive and flavorful for months.
After harvesting, post-harvest care ensures your chives bounce back quickly. Water deeply at the base to replenish moisture lost during cutting, and avoid wetting the leaves to prevent fungal diseases. A light application of balanced fertilizer (5-10-10) every 4-6 weeks during growing season promotes vigorous regrowth.
Mulch around the base with organic matter to retain moisture and suppress weeds, creating ideal conditions for your chives to recover and thrive.
For maximum flavor, always harvest chives in the morning after dew has dried but before the sun intensifies. This is when their essential oils are most concentrated.
Store harvested chives in the fridge wrapped in a damp paper towel for up to 10 days, or freeze them in ice cube trays for later use. Proper storage preserves their freshness and potency, ensuring you can enjoy homegrown chives even when they’re not in season.
With the right timing and technique, your chives will reward you with continuous harvests all season long. The key is consistency: harvest when they’re 8 inches tall, cut 1/3 of the stalks, and provide post-harvest care to keep them thriving.
Soon, you’ll have a flavorful chive supply that rivals store-bought—and you’ll never have to buy them again!
Step-by-step guide: cutting chives without killing the plant
Harvesting chives correctly ensures a continuous supply of fresh, flavorful greens while keeping your plant healthy. The key is timing and technique—cut too much or at the wrong time, and you risk stunting regrowth. I’ve learned that patience and precision pay off with lush, repeating harvests all season long.
Before you grab your shears, know that chives are perennial herbs, meaning they regrow year after year if cared for properly. The goal is to encourage new growth while avoiding over-harvesting, which can leave your plant weak and vulnerable to pests or disease.
Let’s dive into the step-by-step process to keep your chives thriving.
⚠️ callout-warning ⚠️
Cutting chives from the center of the plant or harvesting more than 1/3 of the foliage at once can stunt regrowth. Always cut from the outer stalks first to protect the plant’s core.
✅ Do: Snip stalks at the soil line to encourage new shoots from the base.
❌ Don’t: Use dull scissors or pull stalks—this damages roots and invites disease.
Start by selecting the right tools for the job. A sharp pair of scissors or clean pruning shears is ideal—never use your kitchen knife, as it can introduce bacteria. Before cutting, rinse the blades with rubbing alcohol to prevent spreading any pathogens to your plant.
I like to work on a dry, sunny morning when the leaves are crisp and free of dew.
To harvest, locate the outer stalks of your chive clump. These are the most mature and flavorful parts of the plant. Using your shears, cut the stalks just above the soil line, leaving about 1-2 inches of stubble.
This encourages the plant to send up new shoots from the base. Avoid cutting more than one-third of the plant at a time, even if it looks abundant.
After harvesting, give your chives a little post-harvest TLC to encourage regrowth. Water the soil deeply but gently to avoid disturbing the roots, and consider adding a light layer of compost around the base for nutrients.
If you notice wilting or yellowing after cutting, it’s often a sign of over-harvesting or stress. Revive your chives by trimming any dead leaves, ensuring they get bright light and consistent moisture.
With proper care, your chives will bounce back in 2-3 weeks, ready for another harvest. The secret to a thriving chive patch is balance—harvest wisely, and your plant will reward you with lush, continuous growth all season long. Happy snipping! 🌿