
How To
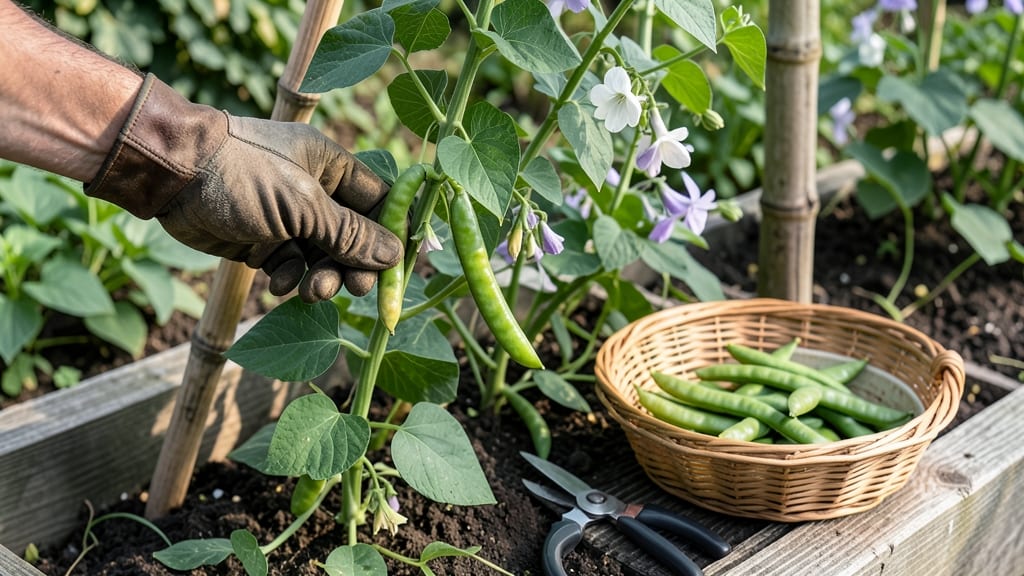
To harvest pole beans at their peak flavor, you’ll need to watch for three key signs: pod size, color, and firmness—each a clue that your 🌱 plants are ready to pick.
Picture this: You’re out in the garden, reaching for a pod that’s just the right length—bright green, glossy, and snapping easily when you bend it. That’s the sweet spot. Miss it, and you’ll either get tough, stringy beans or lose the plant’s energy to produce more.
The difference between a disappointing bite and a garden-fresh feast comes down to timing.
Most gardeners pick their pole beans every 2-3 days during peak season (July–September in Zone 6a), but the real trick is knowing when to start. Harvest too early, and you’ll sacrifice flavor; too late, and the pods turn woody.
Below, I’ll walk you through the exact cues to look for, plus how to handle them without damaging your plants—and keep the harvest rolling for weeks.
You’ll also discover how often to check your vines, what to do with overgrown pods, and why some gardeners swear by harvesting in the morning for the freshest taste. Ready to turn your pole bean patch into a flavor factory?
3 Clear signs your pole beans are ready to harvest (with exact timing)
Knowing when to harvest pole beans transforms your garden from a sea of vines to a treasure trove of fresh, tender pods. Unlike bush beans, pole beans reward patience with a longer harvest window—but only if you pick at the right moment.
Miss the mark, and you’ll end up with stringy, tough pods that taste more like cardboard than crunchy green goodness. Here’s how to nail that perfect harvest timing every time.
Most gardeners focus only on pod size, but the best harvests depend on a combination of visual, tactile, and even auditory cues. A ripe pole bean should be 4-6 inches long, bright green, and firm enough to snap cleanly when bent.
If you’ve ever pulled a pod only to find it still too small or woody, you know how frustrating it can be. The key is learning to read these subtle signals before they disappear.
Use a ruler or compare to your thumb—ripe pods should span from your wrist to your first knuckle. Anything shorter is still maturing.
Dull or yellowing pods mean they’ve overripe. Look for a vibrant, almost waxy sheen—this indicates peak sweetness and tenderness.
Gently bend the pod—it should break with a crisp snap (not a dull crack). If it bends without snapping, it’s past its prime.
Timing your harvest isn’t just about avoiding tough beans—it’s about encouraging more production. Pole beans set new flowers and pods continuously, but they’ll slow down if left unharvested. Once pods reach 6 inches, they start converting sugars into starches, making them less tender and more fibrous.
Pro tip: Check your plants every 2-3 days during peak season (July-August) to catch them at their sweetest.
Color is your first clue, but don’t trust it alone. Some varieties, like Kentucky Wonder, stay green longer than others, while Blue Lake beans might develop faint streaks as they mature.
Always pair color with the snap test—this combo ensures you’re picking at the exact moment when flavor and texture peak. If you’re unsure, harvest a few pods and taste-test them. Your palate will quickly learn the difference between "just right" and "almost there."
Overripe beans aren’t just tough—they signal the plant to focus on seed production instead of new pods. If you see dry, brown pods or hear the rattle of seeds inside, you’ve waited too long.
These beans are still edible (great for soups or drying), but they won’t have the same crisp snap or sweet flavor. Think of it like a countdown: from flower to harvest-ready pod, you’ve got about 10-14 days before the window closes.
One common mistake is assuming all pole beans mature at the same rate. Blue Lake varieties, for example, reach harvest size faster than heirloom types like Rattlesnake. Always check the back of your seed packet for days-to-maturity estimates, then adjust your harvest schedule accordingly.
In my garden, I’ve found that shorter days in late summer slow down maturation, so I harvest more frequently to keep up with the slower pace.
Morning is the best time to harvest because pods are cool and crisp, having lost less moisture overnight. Avoid picking after a rain or in the heat of the afternoon—this can bruise the pods or make them soggy.
Use a sharp pair of pruning shears or simply pinch the stem just above the pod to avoid damaging the vine. Leave the top leaves intact to keep the plant photosynthesizing and producing new blooms.
If you’re growing pole beans for drying or seed saving, let the pods mature fully until they turn yellow and dry on the vine. But for fresh eating, stick to the 4-6 inch rule and harvest consistently.
I’ve seen gardens where harvests dwindled because the gardener picked too aggressively—removing too many pods at once stresses the plant. Aim to take 30-50% of the visible pods per harvest session to balance yield and plant health.
Remember, pole beans are self-pollinating, so each flower has the potential to become a pod. The more you harvest, the more the plant will produce—up to a point.
If your vines look sparse or flowers drop without setting pods, it might be time to reduce harvesting frequency or check for pests like Mexican bean beetles, which can chew through blossoms before they mature.
With these signs in mind, you’ll go from guessing to knowing exactly when to pick. Soon, your kitchen will be stocked with homegrown beans that outshine store-bought in both flavor and texture. Happy harvesting! 🌱
Step-by-step harvesting technique to avoid damaging plants or pods
Harvesting pole beans the right way isn’t just about picking pods—it’s about protecting your plant’s energy and encouraging continuous production. Rough handling or over-mature harvests can stress vines, reduce yields, and even attract pests.
With the right technique, you’ll enjoy weeks of fresh harvests while keeping your plants happy and productive.
Start by gathering a few essential tools: a pair of sharp pruning shears (for larger harvests), a small basket or bucket with holes for drainage, and a pair of gardening gloves to protect your hands.
Avoid using dull tools or pulling pods directly from the vine, as this can damage tender stems and invite disease. The goal is to harvest gently and efficiently.
- Step 1: Choose the right time of day. Harvest in the early morning (before 10 AM) when pods are cool and crisp. Avoid harvesting after rain or in the heat of the day, as pods can be softer and more fragile.
- Step 2: Locate the pods by running your fingers along the vine. Look for pods that are 4-6 inches long and bright green. Gently pinch the pod between your thumb and forefinger to check for firmness—it should snap easily.
- Step 3: Use two hands to harvest: one to support the pod and the other to cut or twist gently. For small harvests, pinch the pod just above the stem and twist it off with a quick motion. For larger harvests, use pruning shears to cut the pod cleanly without damaging the vine.
- Step 4: Avoid over-mature pods, which are dry, woody, or pale. These pods not only taste tough but also signal to the plant that it’s time to stop producing. Regular harvesting encourages more flower and pod development, extending your harvest season.
- Step 5: Store harvested pods in a perforated basket or mesh bag to allow airflow. Keep them in the refrigerator for up to 5 days or use them immediately for the best flavor. Overcrowding pods can lead to moisture buildup and spoilage.
One of the biggest mistakes gardeners make is harvesting too aggressively or ignoring early signs of stress in the plants. If your vines start to look yellow or wilted, it’s a sign you’ve been harvesting too much without giving the plant time to recover.
Aim to harvest every 2-3 days during peak production, but always leave at least 30% of the pods unharvested to ensure the plant keeps flowering.
To encourage continuous production, pair your harvesting routine with consistent care. After each harvest, water deeply in the morning to replenish moisture, and consider adding a light fertilizer (like a 5-10-10 blend) every 4-6 weeks to support ongoing growth.
Prune any dead or yellowing leaves to improve airflow and reduce pest risks.
Finally, keep an eye out for pests like bean beetles or aphids, which are more likely to attack stressed plants. If you notice chewed leaves or sticky residue, treat the plants with neem oil or introduce beneficial insects like ladybugs to keep pests in check.
A healthy plant is your best defense against infestations.