
How To
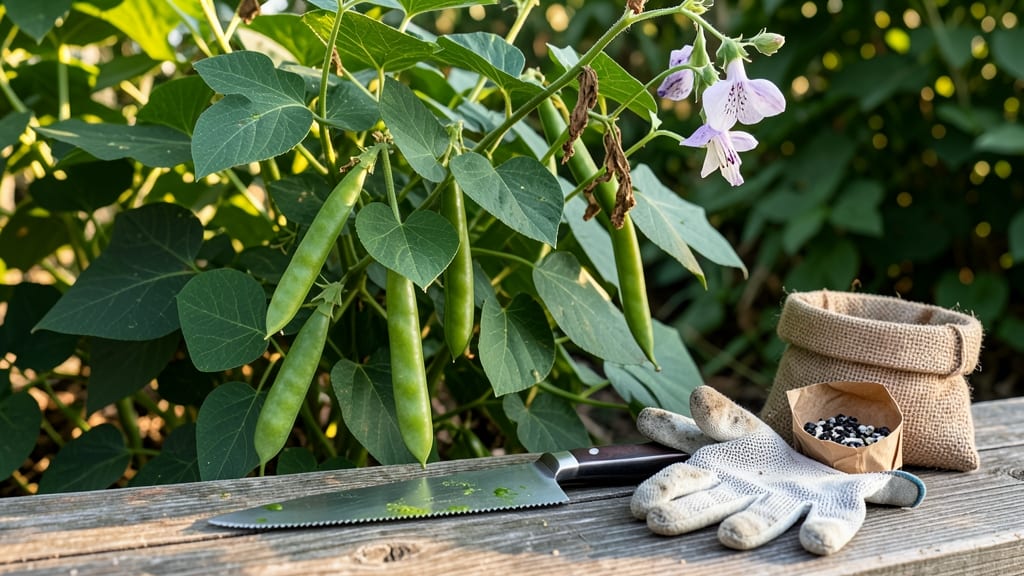
Harvesting green bean seeds from mature plants is the best way to save money and preserve heirloom varieties for next year’s garden.
Picture this: you’ve spent months nurturing your 🌱 green beans, and now the pods are turning brown and papery—this is your golden opportunity to skip the seed packet and grow your own. But if you harvest too early or too late, you’ll end up with seeds that won’t sprout.
The key is knowing exactly when those pods are ready and how to dry them properly to lock in viability.
In this guide, I’ll walk you through every step—from spotting the perfect seed pod to drying and storing your harvest so you can replant with confidence. No more guessing whether your seeds will grow or wasting time on failed batches.
Let’s turn those beans into a reliable seed source for years to come.
You’ll also learn how to troubleshoot common mistakes, like uneven drying or pest contamination, and which tools make the process faster and more efficient. Ready to become self-sufficient with your green bean seeds?


When and how to identify green beans ready for seed harvesting
Timing is everything when saving green bean seeds. Harvesting too early means immature seeds, while waiting too long risks shattering pods or dried-out seeds. The key is catching pods at the perfect stage—when they’re fully mature but haven’t yet released their seeds naturally.
This usually happens 8-10 weeks after flowering, depending on your variety and climate.
First, choose the right varieties for seed saving. Heirloom types like Kentucky Wonder, Blue Lake, or Rattlesnake produce reliable seeds, while hybrid varieties (often labeled F1) may not breed true.
If you’re unsure, stick to open-pollinated beans—these are the gold standard for seed saving. Plant a dedicated row just for seed production to avoid cross-pollination with other varieties.
Here’s how to spot the perfect pods: they’ll be dry, papery, and tan-colored (not green) when fully mature. The pods should rattle when shaken—this is your cue that seeds are ready.
If you crack one open, the seeds inside should be plump, firm, and a deep color (not shriveled or discolored). This stage comes after the pods have stopped growing and the plant’s energy shifts to seed production.
🌱
To inspect pods accurately, pick a mature but still intact pod from the plant. Gently twist it off the vine—if it resists, it’s not ready.
Once detached, check for these three key signs: the pod should feel dry and crisp (not moist), its color should shift from green to tan or brown, and when you shake it, you’ll hear seeds rattling inside.
This stage typically occurs 1-2 weeks after the pods stop producing edible beans.
Pay attention to the seed color and texture inside the pod. Healthy seeds should be plump, smooth, and uniformly colored (e.g., cream, white, or dark purple). Avoid pods with wrinkled, discolored, or moldy seeds—these won’t germinate.
If you’re unsure, split open a few pods from different plants to confirm consistency. Inconsistent seed quality can signal poor pollination or disease, which may affect viability.
Morning is the best time to harvest for seed saving. Cool temperatures and dry conditions help pods dry evenly and prevent mold. Use clean, sharp pruning shears or scissors to avoid damaging the plant.
Lay the harvested pods on a paper towel or mesh screen in a dry, shaded area to finish drying. This prevents moisture buildup, which can lead to rot or fungal issues during storage.
🌿
Not all green beans are created equal when it comes to seed saving. Bush beans (like Blue Lake) mature faster and are easier to manage than pole beans, which can cross-pollinate if planted too close together.
If you’re growing pole beans, isolate varieties by at least 50 feet or use row covers to prevent accidental cross-pollination. Keep detailed notes on each variety, including pod color, seed shape, and maturity date—this helps track performance year after year.
One common mistake is harvesting seeds from store-bought beans, which are often hybrids. These seeds won’t grow true to type, wasting your effort. Stick to seeds you’ve saved yourself or purchase certified organic, heirloom seeds from reputable suppliers.
If you’re new to seed saving, start with one reliable variety to build confidence before expanding your collection.
✂️
Step-by-step green bean seed drying and storage process
Once you’ve harvested your mature green bean pods, the next critical step is proper drying to preserve seed viability. The drying process removes moisture, preventing mold and ensuring seeds stay dormant until planting.
Two primary methods—air-drying and oven-drying—each have unique advantages depending on your climate and available tools.
For air-drying, choose a well-ventilated area with 50-60% humidity and temperatures between 60-80°F. This mimics natural conditions and avoids heat damage. If humidity exceeds 60%, switch to a dehumidifier or oven method to prevent mold growth. Proper drying extends seed life for 3-5 years when stored correctly.
How to Dry and Store Green Bean Seeds
-
Step 1: Extract Seeds
Open dried pods and remove seeds with fingers or tweezers. Discard any discolored or shriveled seeds—they won’t germinate. -
Step 2: Choose Drying Method
Air-dry: Spread seeds on paper towels in a shady, dry location for 1-2 weeks.
Oven-dry: Set oven to 135°F (lowest setting), spread seeds on a baking sheet, and dry for 1-3 hours, checking frequently. -
Step 3: Test for Moisture
Press a seed between two paper towels. If moisture appears, dry longer. Seeds should feel light and brittle—not damp or sticky. -
Step 4: Store Properly
Place dried seeds in airtight containers (glass jars or envelopes) with a desiccant packet to absorb moisture. Label with variety name and date. -
Step 5: Store in Cool, Dark Place
Keep containers in a refrigerator or root cellar (ideal: 35-40°F) to slow aging. Avoid basements with high humidity.
After drying, store seeds in glass jars with tight-sealing lids or paper envelopes to block light and pests. Label each container with the variety name and harvest year—this prevents mix-ups and helps track germination rates over time.
For heirloom varieties, include notes on plant characteristics like pod color or disease resistance.
Test stored seeds annually by placing 5-10 seeds on a damp paper towel in a warm location. If 80% germinate within 7-14 days, your storage method is working. Low germination (<50%) signals poor storage conditions—adjust humidity or container seals immediately. With proper care, heirloom seeds can remain viable for decades!
For gardeners in humid climates, silica gel packets in storage containers reduce moisture risks. If seeds develop mold or musty smells, discard them immediately—contamination spreads quickly. Always prioritize clean, dry conditions over convenience to protect your seed investment.