
How To
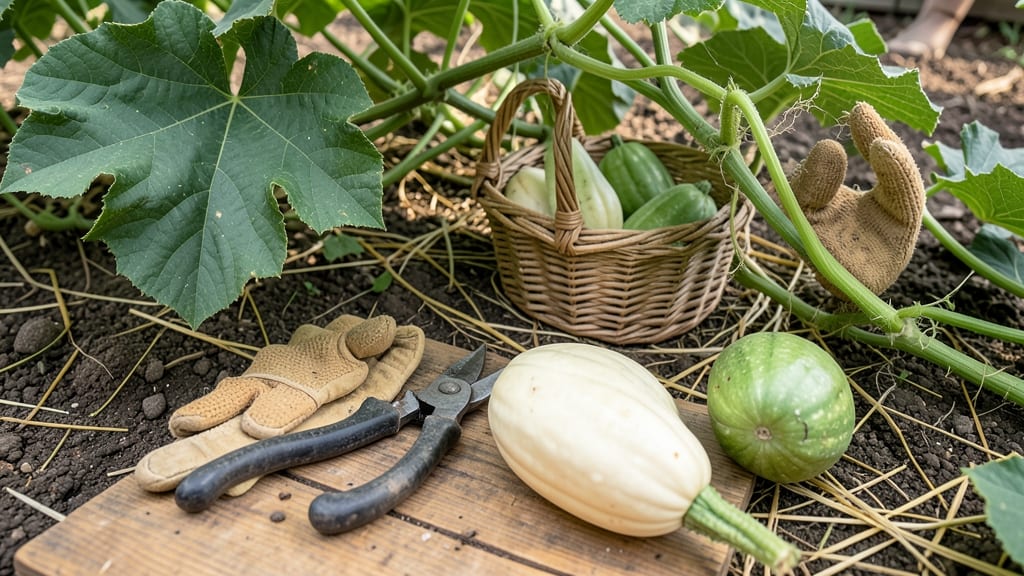
Harvesting bottle gourds at the right time ensures they’re at their perfect flavor and texture—before the vine bolts and the fruit toughens.
Bottle gourds 🎃 are a gardener’s treasure—but harvesting too early or too late can ruin their flavor and texture. Timing is everything, especially when vines bolt and fruit becomes tough.
You’ll know they’re ready when the skin turns hard and glossy, the stem dries at the base, and growth slows. Miss these cues, and you might end up with underripe gourds that won’t store well or overripe ones that turn woody.
Below, I’ll break down the 3 key signs of ripeness, how to avoid common mistakes, and the best ways to use your harvest—whether fresh, stored, or cooked.
3 Visual and tactile signs your bottle gourd is ready for harvest
Harvesting your bottle gourds at the right moment ensures maximum flavor and texture. Unlike many squash varieties, these gourds don’t soften when overripe—they simply become tough and fibrous. The key is catching them at the peak of ripeness, when their skin hardens and growth slows dramatically.
I’ve learned that even a day too early or late can make all the difference in how you use them—whether for fresh eating, storage, or cooking.
One of the biggest mistakes I see gardeners make is waiting too long, assuming bigger means better. But by the time a bottle gourd reaches its maximum size, its flesh often turns stringy and bland.
The trick is to watch for three key visual and tactile cues that signal perfect ripeness. These signs work for all bottle gourd varieties, from classic green types to white or striped heirlooms.
Let’s start with the most obvious clue: size. Mature bottle gourds typically measure between 6 to 12 inches in length, depending on the variety. However, size alone isn’t enough—you’ll also want to check two other critical factors.
For example, my ‘Long White’ bottle gourds often reach 10 inches before they’re truly ready, while smaller varieties like ‘Tiffany’ might only grow to 6 inches. Always pair size with the other two signs to avoid mistakes.
| Sign | Immature Gourd | Mature Gourd |
|---|---|---|
| Size | 4–8 inches, still growing rapidly | 6–12 inches, growth slows |
| Skin Texture | Soft, easily punctured with fingernail | Hard, glossy, difficult to puncture |
| Stem Condition | Green, flexible, attached firmly | Dries, yellows, begins to separate |
| Color Development | Pale, uneven, or still changing | Fully developed (green, white, or striped) |
The skin texture is your next best friend when determining ripeness. A mature bottle gourd’s skin should be so hard that you can’t puncture it with your fingernail.
When I first grew bottle gourds, I used to confuse this with overripeness, but the opposite is true—if the skin is too soft, the gourd is underripe.
For example, my ‘Green Streaked’ gourds had a deceptively tough look when immature, but their skin was still soft enough to dent with gentle pressure. Always test this before deciding to harvest.
Don’t overlook the stem condition, which often gives away the gourd’s true ripeness. As the fruit matures, the stem where it attaches to the vine will begin to dry out and turn yellow. This is nature’s way of telling you it’s time to pick.
I’ve noticed that if I wait until the stem completely detaches, the gourd’s flesh can become fibrous. Instead, harvest when the stem is just starting to dry—this usually means the gourd is at its peak for fresh eating or storage.
Color is the third critical cue, though it varies by variety. Some bottle gourds, like ‘White Wonder’, develop a creamy white hue when fully ripe, while others, like ‘Long Green’, stay green but darken and deepen in shade.
The key is consistency: once the color stops changing and looks uniform, the gourd is likely ready. I once picked a striped gourd too early because the stripes weren’t fully defined, and the flavor was disappointingly bland compared to later harvests.
One common mistake I see is harvesting bottle gourds based on size alone. Some varieties, like ‘Tiffany’, stay small but are ready to pick when they reach just 4–6 inches. Others, like ‘Long White’, can grow much larger before they’re truly ripe.
Always combine size with the other two signs to avoid underripe or overripe fruit. For instance, a 10-inch gourd with soft skin isn’t ready, even if it looks big and mature.
If you’re unsure whether your bottle gourd is ready, try the tapping test. Give the gourd a gentle tap with your knuckles—if it sounds hollow and firm, it’s likely ripe. A dull thud usually means it’s still developing.
This simple trick has saved me from harvesting gourds that weren’t quite there yet. I’ve also found that mature gourds feel heavier for their size, thanks to their thick, hard skin and dense flesh.
Once you’ve confirmed ripeness, harvest your bottle gourds carefully using a sharp knife or pruners. Leave a 1–2 inch stem attached to prevent rot and extend storage life. After harvesting, cure them in a warm, dry place for 5–7 days to harden the skin further.
This step is especially important if you plan to store them long-term or use them in cooking, as it enhances their flavor and shelf life.
Remember, bottle gourds are incredibly versatile, and their ripeness determines how you’ll use them. Young, tender gourds are perfect for stir-fries or soups, while fully mature ones shine in storage or as decorative pieces.
By mastering these three signs—size, skin texture, and stem condition—you’ll never miss the perfect harvest window again. Happy growing! 🎃
How to prevent bolting and ensure a long harvest window
Bottle gourds can bolt quickly when stressed, cutting your harvest short. Bolting occurs when plants rush to flower and fruit due to heat, drought, or poor soil. The good news? With the right strategies, you can delay bolting and extend your harvest window by 3-4 weeks.
Start by focusing on soil health—rich, well-draining soil prevents stress signals that trigger bolting.
Consistent watering is your next defense. Bottle gourds need 1-2 gallons of water every 3-5 days, especially during flowering and fruiting. Let the top 2 inches of soil dry between waterings to avoid root rot while keeping moisture steady.
Mulching with straw or grass clippings helps retain soil moisture and regulates temperature.
⚠️ callout-warning
Bolting starts with tall, rapid stem growth and yellowing leaves. If you see flower buds forming too soon, prune aggressively to redirect energy to fruit production. Act within 3-5 days to salvage your harvest.
💡 Pro Tip: Harvest young gourds first to reduce plant stress and delay bolting.
Pruning is another powerful tool. Remove excessive side shoots and overcrowded leaves to improve air circulation and focus energy on existing fruit. Aim to keep 3-5 main vines per plant, pruning back 20-30% of foliage if growth becomes unruly. This reduces competition for nutrients and slows bolting.
Nutrient balance is critical—too much nitrogen promotes leafy growth, while too little phosphorus or potassium weakens the plant. Use a balanced 5-10-10 fertilizer every 4-6 weeks during the growing season. Side-dress with compost or banana peels (high in potassium) to support fruit development without triggering early bolting.
Shade cloth can be a lifesaver in hot climates. If temperatures exceed 90°F (32°C), provide 30-50% shade during peak afternoon heat. This reduces stress without stunting growth. Pair shade with drip irrigation to keep roots cool and moisture levels stable.
Finally, choose bolt-resistant varieties like 'Long White' or 'Tiffany' if you live in a short-season climate. These varieties mature faster and tolerate heat better. Combine these strategies, and you’ll enjoy a longer harvest window with fewer tough, seedy gourds.