
How To
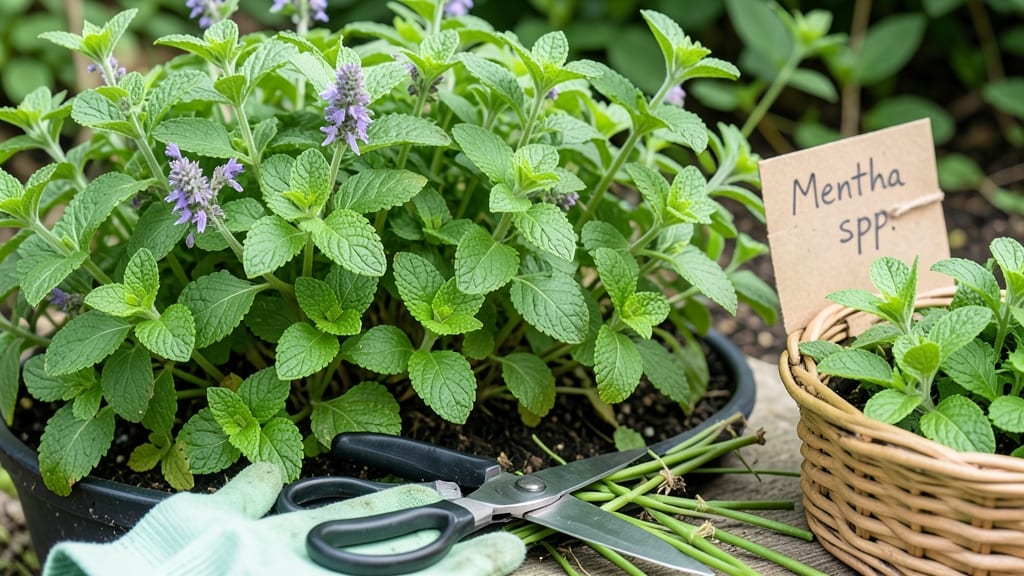
Harvesting mint at the right time and with the right technique is the best way to keep it thriving and packed with flavor 🌿—because once it bolts, you’re left with bitter stems and zero regrowth.
Mint isn’t just a kitchen staple—it’s a powerhouse herb that thrives when harvested correctly, but timing and technique make all the difference between pungent flavor and bitter disappointment.
You’ll want to snip just above a leaf pair or node to encourage bushier growth, and always avoid cutting more than one-third of the plant at once. Below, I’ll walk you through the exact steps, from the ideal harvest window to storage tricks that keep your mint fresh for weeks.
Whether you’re growing it in pots or garden beds, these methods will ensure your mint stays lush, flavorful, and ready to harvest all season long—no wilting or flowering in sight.
When and how to harvest mint for peak flavor and growth
Harvesting mint at the right time ensures bold flavor and encourages lush regrowth. The key? Timing before flowering—once mint bolts, those tender leaves turn bitter and woody. I’ve learned the hard way that waiting too long ruins both the taste and the plant’s future harvests.
Let’s dive into the optimal windows and techniques to keep your mint thriving.
Mint grows aggressively, but its peak flavor occurs when leaves are young and vibrant. Aim to harvest 3-4 times per season, spacing cuts 4-6 weeks apart to avoid over-stressing the plant.
The best time of day is morning, after dew dries but before the sun peaks—this preserves oil potency and prevents wilting. Pro tip: Harvest stems rather than individual leaves to stimulate bushier growth.
Step-by-Step Guide to Harvesting Mint for Maximum Flavor
-
Step 1: Wait for the Right Height
Harvest when stems reach 4-6 inches tall—this ensures leaves are fully developed but not yet flowering. Check for glossy, vibrant green leaves as a sign of readiness. -
Step 2: Choose the Best Stems
Select outer stems first to avoid damaging the center. Look for upright, healthy growth with at least 3-4 leaf nodes per stem. -
Step 3: Use Sharp Pruners or Scissors
Cut stems at a 45-degree angle, 1-2 inches above a leaf node. This encourages new shoots to grow from that point. Avoid tearing leaves. -
Step 4: Harvest in the Morning
Pick stems between 8-10 AM when essential oils are at their peak. Place cuttings in a paper towel-lined container to absorb moisture and prevent spoilage. -
Step 5: Rinse and Dry Immediately
Gently rinse stems under cool water to remove dirt, then pat dry with a clean towel. Let air-dry for 10-15 minutes before storing or using. -
Step 6: Encourage Regrowth
After harvesting, water deeply and apply a balanced fertilizer (10-10-10) to support recovery. Avoid over-fertilizing, which can lead to leaf burn.
🌿 Pro Tip: Never harvest more than 1/3 of the plant at once to prevent stress.
Harvesting mint before flowering is critical—once those purple flower spikes appear, the leaves lose their signature minty punch and become woody and harsh. I’ve seen mint plants go from fragrant to nearly useless in just 2 weeks after flowering starts.
If you miss the window, you can still harvest, but the flavor won’t be the same. For year-round harvests, grow mint in containers and bring them indoors before the first frost.
Mint’s regrowth speed is impressive—with proper care, you can harvest every 4-6 weeks throughout the growing season. The secret? Consistent pruning keeps the plant compact and bushy.
I like to harvest young leaves sporadically between main cuts to encourage even growth. Just avoid over-trimming, which can leave the plant vulnerable to pests and disease.
For container-grown mint, harvesting is even simpler—just snip stems as needed and let the plant spill over the edges. If your mint starts to bolt (flower), don’t panic! You can still harvest the lower leaves, but focus on preserving the plant for next season.
In hot climates, provide afternoon shade to delay flowering and extend the harvest window.
One common mistake I see is harvesting with dull tools, which crushes stems and invites disease. Always use clean, sharp scissors or pruners to make precise cuts. Another tip: Avoid harvesting wet leaves—moisture trapped in the foliage can lead to fungal issues like powdery mildew.
If you must harvest after rain, let the plant dry completely before cutting.
To maximize mint’s potency, store harvested stems in the fridge for up to 2 weeks or freeze them in ice cubes for later use. For long-term storage, dry the leaves by hanging stems upside down in a dark, well-ventilated space for 1-2 weeks.
Once dried, store in an airtight container away from light to preserve flavor. This method works especially well for culinary and medicinal uses.
If your mint plant starts to look leggy or sparse, it’s a sign you’ve been harvesting too aggressively. Give it a break for 4-6 weeks and focus on watering and fertilizing to encourage a full recovery.
With the right balance of harvesting and care, your mint will reward you with abundant, flavorful leaves all season long. Happy harvesting! 🌱
Mint harvesting mistakes that ruin flavor and stunt growth
Harvesting mint at the wrong time or using improper techniques can turn your vibrant green plant into a bitter, leggy shadow of its former self. I’ve seen over-pruned mint plants struggle to recover, while others lose their signature flavor because they were harvested too late.
The key is understanding when to cut, how much to remove, and how to store it properly to keep your plant thriving.
One of the biggest mistakes is waiting until mint flowers to harvest. Once those purple or white blooms appear, the plant’s energy shifts from producing flavorful leaves to creating seeds. This not only weakens the plant but also makes the leaves taste harsher and more bitter.
Even experienced gardeners sometimes overlook this critical timing, leading to disappointment in both flavor and growth.
⚠️ Critical Mistake: Harvesting at the Wrong Stage
Never harvest mint after it flowers—this drains the plant’s energy and reduces flavor. Instead, prune just before flowering when leaves are large, glossy, and aromatic. Use clean, sharp scissors to cut stems 1-2 inches above a leaf node to encourage bushier growth.
Pro Tip: Harvest in the morning after dew has dried but before the sun intensifies. This preserves oil content and flavor.
Another common error is over-pruning too much at once. Mint is resilient, but removing more than one-third of the plant in a single session can shock it. I’ve seen gardeners trim back entire stems, leaving the plant looking like a bare skeleton.
Instead, aim for regular, light pruning every 4-6 weeks to maintain shape and encourage new growth.
Improper storage after harvesting is another silent killer of mint’s flavor. Many people wash their freshly cut mint and store it in plastic bags with high humidity. This creates the perfect environment for mold and wilting.
To preserve freshness, pat leaves dry with a paper towel, store them in a loosely sealed container, and keep them in the crisper drawer of your fridge for up to 7 days.
If you’re drying mint for long-term storage, avoid bundling stems too tightly. This can cause the leaves to crush and lose their oils. Instead, hang small bundles upside down in a dark, well-ventilated area for 1-2 weeks.
Once dry, strip the leaves and store them in an airtight container away from light. Proper drying ensures your mint retains its aromatic oils for months.
Finally, neglecting to fertilize after harvesting can stunt growth. Mint is a heavy feeder, and frequent pruning depletes its nutrients. After each harvest, apply a balanced 10-10-10 fertilizer to replenish what was removed.
This keeps your plant lush, flavorful, and ready for the next harvest. With these tips, your mint will stay vibrant and productive year-round.