
Picking
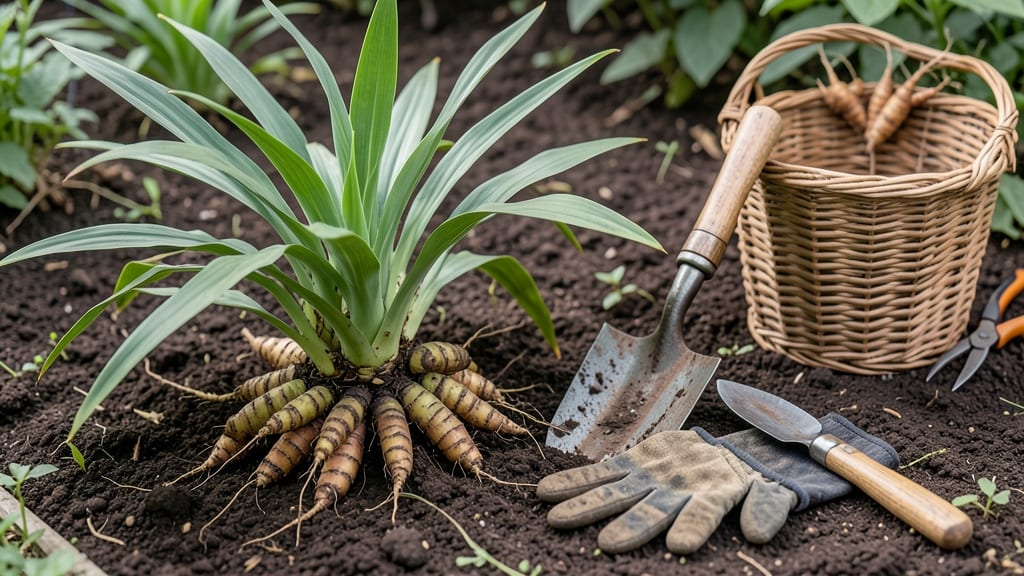
Harvesting ginger at the right time means the difference between a mild, fibrous rhizome and a bold, aromatic spice packed with flavor.
Picture this: you’ve nurtured your ginger plant 🌿 for months, watching it grow from a small rhizome into a lush, waist-high herb. Now, the leaves are turning yellow, and you’re wondering—when is the perfect moment to dig?
Getting the timing wrong can leave you with ginger that’s either too woody or loses its signature kick.
In Zone 6, where most gardeners grow ginger, the ideal harvest window falls between October and November, about 9-10 months after planting in spring. But here’s the catch: frost sensitivity plays a huge role.
If a hard freeze hits before you harvest, your ginger’s flavor and storage potential take a nosedive.
In this guide, I’ll walk you through the knife-test trick to check readiness, how to adjust for your specific climate, and exactly how to cure and store your harvest for maximum pungency and shelf life.
No more guessing—just a foolproof way to enjoy homegrown ginger that tastes like it came straight from the spice aisle.

When to harvest ginger for maximum pungency & storage potential
Ginger thrives on patience, and harvesting too early or late can ruin its signature spicy kick and storage potential. The best ginger harvest time falls between late fall (October-November) in most climates, but this shifts slightly based on your USDA zone and variety.
For example, in Zone 6, I harvest mine just before the first frost—usually around mid-October—when the foliage starts yellowing but hasn’t fully died back.
Waiting too long past the ideal harvest window can turn your fiery ginger into a bland, woody mess. Overripe rhizomes lose their volatile oils (the compounds responsible for that signature heat), and the flesh becomes fibrous.
Even worse, frost can damage the plant, making the rhizomes soggy and inedible. But harvest too early, and you’ll end up with small, underdeveloped rhizomes that lack the complex flavor you crave.
Climate plays a huge role in timing. In warmer zones (8-10), ginger may stay productive longer, so I often harvest as late as December.
Meanwhile, in cooler zones (4-6), the growing season is shorter, so I prioritize harvesting before the first frost—even if the rhizomes aren’t fully mature. The key is balancing maturity with weather risks.
Here’s the golden rule: Harvest when 50-70% of the foliage has turned yellow and started dying back. This signals the plant is redirecting energy to the rhizomes, where the flavor compounds concentrate. If you’re unsure, use the knife-test method—I’ll explain how this works in a moment.
The knife-test method is my go-to trick for pinpointing the perfect harvest time. Simply slice into a rhizome with a sharp knife—if the flesh is pale yellow and resists the blade slightly (but still cuts cleanly), it’s ready.
A greenish center means it’s too early, while a brown, woody core signals it’s past its prime. I’ve found this method works even if the foliage isn’t fully yellowed yet.
Spring harvests are possible but risk weaker flavor. If you miss the fall window, you can dig up a few rhizomes in early spring (March-April) for fresh use, but these won’t store as long.
The volatile oils that give ginger its punch peak in fall, so spring-harvested rhizomes often taste milder. For storage purposes, always prioritize the fall harvest.
Pro tip: If you’re growing Jamaican ginger or other heat-loving varieties, they may need an extra month in the ground. These types often mature 2-3 weeks later than common ginger, so adjust your timing accordingly.
I once harvested my Jamaican ginger in early November, and the rhizomes were twice as pungent as the ones I pulled too early!
Regional adjustments are key. In humid climates, ginger may stay green longer, so I focus on the knife test over foliage color. In dry areas, the plant may yellow faster, so I harvest slightly earlier to avoid stress.
Always monitor your specific microclimate—what works in Zone 6 might not apply to Zone 9.
Finally, never harvest in freezing temperatures. Cold soil makes rhizomes brittle and prone to rot. If frost is forecast, dig up your ginger 3-5 days ahead and cure it indoors. This small adjustment can save your entire crop from becoming a mushy disappointment.
Timing your harvest correctly ensures your ginger is bursting with flavor and stores for months. Next, I’ll show you how to perform
Step-by-step knife test: how to check ginger readiness before digging
Harvesting ginger at the right moment ensures maximum flavor and storage potential. The knife test is my go-to trick—it’s faster than waiting for leaves to yellow and gives precise feedback. This method works for organic ginger, Jamaican ginger, and other varieties, though timing may vary slightly.
Before digging, pick a healthy-looking rhizome near the plant’s base. Use a sharp knife to slice into the rhizome—this simple test reveals whether it’s ready or needs more time. The color, texture, and moisture of the cut surface tell the whole story.
For organic ginger, I’ve found that the knife test is most reliable in late fall (October-November in Zone 6). If you’re growing Jamaican ginger, start testing in early fall—its thinner skin matures faster.
Always harvest on a dry, overcast day to prevent the rhizomes from drying out too quickly.
Once you’ve confirmed readiness, dig carefully with a fork to avoid damaging the rhizomes. Rinse off soil gently, then let them cure in shade for 3-5 days before storing. This step boosts flavor and extends shelf life by up to 6 months in a cool, dark place.
Pro tip: If your ginger tests too early (pale or soft), hold off on digging. Overripe ginger loses its pungent kick and becomes fibrous—something no spice lover wants! 🌿