
How To
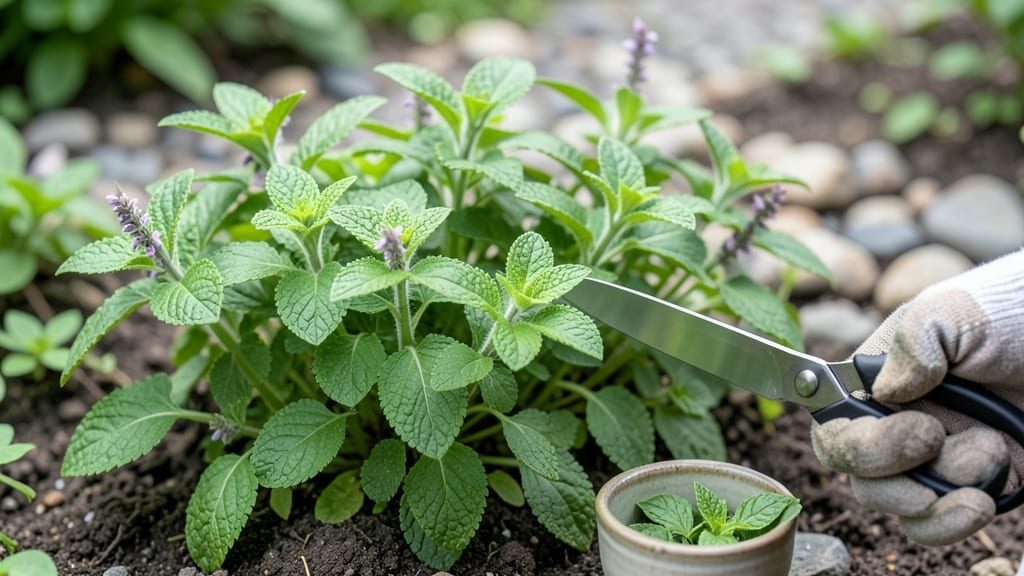
Harvesting mint plants at the right time ensures you get the freshest, most flavorful leaves while keeping your 🌿 thriving for months.
Picture this: you reach for a sprig of mint to make your famous mojitos, only to find the stems woody and the leaves bitter. That’s the sign you missed the best harvest window—or worse, over-harvested.
But with the right timing and technique, you can enjoy vibrant, aromatic mint all season long.
Whether you’re growing mint in pots or garden beds, the key is cutting stems just above a leaf node (where new growth emerges) and doing it when the plant is actively growing. This simple trick encourages bushier, more productive plants while keeping the flavor strong.
In this guide, I’ll walk you through the exact steps for harvesting mint—from when to snip (hint: it’s not when it’s flowering!) to how to store it for maximum freshness.
You’ll also learn how to avoid common mistakes that turn your mint into a sad, leggy shadow of its former self.
When and how to harvest mint for maximum flavor and regrowth
Harvesting mint at the right time ensures you get the brightest flavor and encourage your plant to grow back thicker and healthier. The best time to harvest mint is during the morning hours when essential oils are at their peak.
This applies whether your mint is growing indoors in pots or outdoors in garden beds. If you wait too long, your mint can become woody and less flavorful, making it less ideal for teas, cocktails, or cooking.
For outdoor mint plants, aim to harvest between late spring and early fall (June through September in most climates). If you're growing mint indoors year-round, you can harvest whenever the leaves reach maturity, but avoid harvesting during winter dormancy when growth slows.
The key is to cut back regularly to prevent the plant from becoming leggy or overcrowded.
- 1 Choose the right stems: Select non-flowering stems with vibrant green leaves. Avoid stems that are turning brown or woody, as they’ll have a weaker flavor.
- 2 Use clean, sharp scissors: A pair of pruning shears or clean kitchen scissors will give you the cleanest cut. Avoid tearing leaves, which can damage the plant.
- 3 Cut just above a leaf node: This encourages new growth from that spot. Aim for a 45-degree angle to prevent water from pooling on the cut.
- 4 Harvest regularly: For continuous regrowth, trim your mint every 4-6 weeks. This prevents the plant from becoming overcrowded or leggy.
- 5 Avoid harvesting flowers: If your mint starts flowering, cut the flower spikes immediately. This redirects energy back to the leaves, keeping them flavorful and tender.
When harvesting mint, focus on the younger, softer stems for the best flavor. Older, woody stems will taste bitter and are best avoided. If your mint plant is outdoor-grown, prioritize harvesting in the morning after dew has dried to ensure the leaves are crisp and full of moisture.
For indoor mint plants, morning harvests also work best, but you can adjust based on your lighting conditions.
One common mistake is over-harvesting in a single session. Never take more than one-third of the plant at once, or you risk stunting its growth. Instead, space out your harvests to maintain a balanced and bushy plant.
If you’re using mint for culinary purposes, harvesting small amounts frequently will keep your supply fresh and flavorful.
Seasonal considerations play a big role in mint harvesting. In summer months, mint grows rapidly, so you can harvest more frequently. However, in winter or early spring, growth slows down, and you should harvest sparingly or not at all.
If your mint is indoor-grown, supplement with grow lights to maintain consistent growth year-round.
After harvesting, rinse the leaves gently under cool water to remove any dirt or pests. Pat them dry with a paper towel or let them air-dry before storing. For long-term storage, you can freeze the leaves in ice cubes or dry them in bundles.
This preserves their aroma and flavor for future use in teas, sauces, or homemade remedies.
If your mint plant starts to look leggy or sparse, it’s a sign you’ve been harvesting too much or not enough. In this case, prune back the entire plant by cutting it down to 4-6 inches tall.
This encourages new, bushier growth and helps the plant recover its vigor. With the right harvesting techniques, your mint will stay productive and flavorful for years.
Remember, the goal is to balance harvest and regrowth. By following these tips, you’ll enjoy a constant supply of fresh mint without sacrificing the plant’s health.
Whether you’re using it for cooking, teas, or medicinal purposes, proper harvesting ensures you always have the best-tasting mint at your fingertips. 🌿
Step-by-step mint trimming guide: avoid these common mistakes
Trimming mint properly is the secret to keeping your plant lush, flavorful, and productive for months. Unlike many herbs, mint thrives when pruned regularly—but only if you do it correctly.
Cutting too much or in the wrong places can stress your plant, leading to woody stems and stunted growth. The key is balancing harvest with regrowth, using the right tools, and knowing where to snip.
Start by gathering your tools: a pair of clean, sharp pruning shears (or even kitchen scissors in a pinch) and a small bowl for your harvest. Avoid dull blades—they crush stems, making your mint taste bitter.
Work on a dry, sunny morning when the leaves are fully hydrated, ensuring cleaner cuts and faster healing for your plant.
⚠️ Critical Mistake Alert: Over-Harvesting
Never remove more than 1/3 of your mint plant at once. This herb grows aggressively, but cutting too much weakens the roots and starves the plant. If you harvest more than 30% of the foliage, you risk stunted growth or death. For container plants, limit harvests to 10-15% of the plant per session.
Signs you're over-harvesting: Yellowing leaves, bare stems, or slow regrowth. If your mint looks stressed after trimming, you've gone too far.
For top pruning (the most common method), locate the top 3-4 sets of leaves on a stem and cut just above the leaf node. This encourages new side shoots to grow, creating a bushier plant.
Always cut at a 45-degree angle to increase surface area for water absorption and reduce disease risk.
If your mint is getting too leggy or sparse, try side pruning. Look for stems that are half the height of the plant and cut them back to a leaf node.
This method opens up airflow and prevents mold while promoting a fuller shape. Avoid cutting into old, woody stems—these won't regrow and will leave your plant looking bare.
After trimming, rinse your mint immediately under cool water to remove dirt and pests. Pat the leaves dry with a clean towel to prevent fungal growth. Store harvested mint in a loosely sealed container with a paper towel to absorb excess moisture.
For long-term storage, freeze leaves in ice cube trays or dry them in a shady, well-ventilated area.
Mint is one of the most forgiving herbs when it comes to pruning, but consistency is key. Aim to trim your plant every 4-6 weeks during the growing season (spring to fall).
With the right technique, your mint will stay vibrant, fragrant, and productive for years—without ever becoming woody or sparse.