
How To
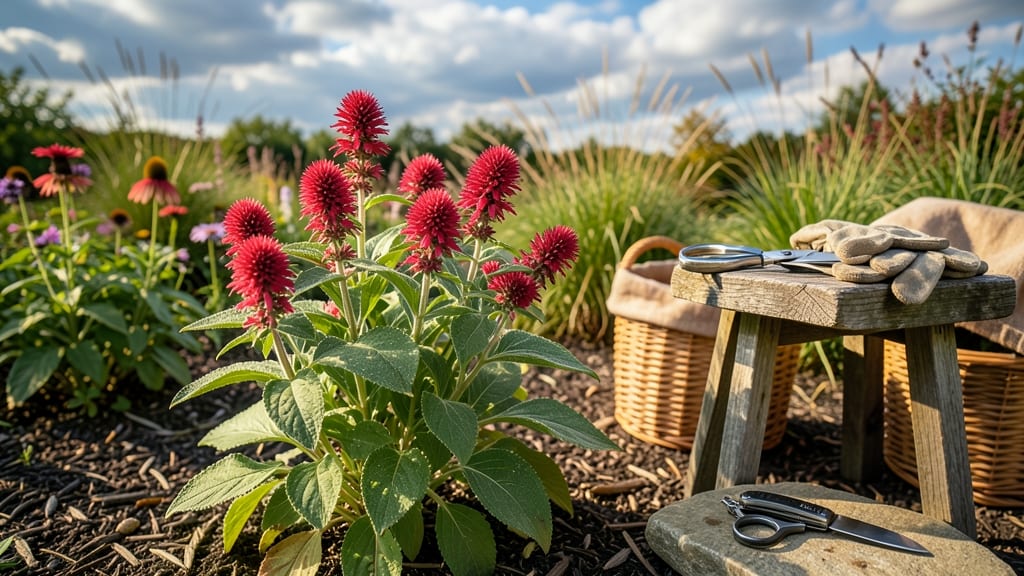
Harvesting bee balm 🐝 at the right time ensures the best flavor, color, and medicinal properties—whether you're drying it for tea or using it fresh in recipes.
Picture this: you’ve waited all season for your bee balm to bloom, only to cut it too late and end up with wilted stems or bitter-tasting flowers. That’s why timing is everything, and the stem snap test is your secret weapon for knowing when to harvest.
In this guide, I’ll walk you through the exact peak bloom stages to harvest, how to use the stem snap test to check freshness, and the best techniques to preserve your harvest without damaging the plant.
From avoiding common mistakes like harvesting after rain to drying your flowers properly, you’ll learn everything you need to keep your bee balm thriving—and your harvests abundant—for years to come.
When to harvest bee balm for maximum flavor and medicinal benefits
Harvesting bee balm (Monarda spp.) at the wrong stage can turn a fragrant, medicinal treasure into a bitter, flavorless disappointment. The key lies in understanding its bloom stages and using the stem snap test—a simple trick to gauge ripeness.
Whether you're harvesting for dried bouquets, herbal teas, or medicinal tinctures, timing directly impacts potency and taste.
Bee balm typically blooms between mid-summer and early fall, with peak harvest windows varying by USDA Zone 6a (like most gardeners in the Midwest). In my garden, I start monitoring plants in July, but the exact timing depends on your local climate and planting date.
The best harvest window is when 20-30% of buds have just begun to open—this ensures maximum essential oil content and vibrant color.
Here’s the science behind why timing matters: Bee balm’s medicinal compounds, like thymol and carvacrol, peak when flowers are in the bud stage. Once fully open, these compounds degrade, and the flavor becomes milder and less aromatic.
For culinary uses, harvest leaves just before flowering for the strongest minty flavor.
| Harvest Stage | Key Characteristics | Best For | Avoid If |
|---|---|---|---|
| Bud Stage (Just Opening) | Flower buds partially unfurling, stems firm and upright, vibrant color | Dried bouquets, herbal teas, tinctures | Harvesting after rain (damp flowers) |
| Early Bloom (20-30% Open) | Stem snap test passes (clean break), leaves fully developed | Fresh culinary use, essential oil extraction | Overcast days (lower potency) |
| Full Bloom (50%+ Open) | Petals fully unfurled, stems may soften, flavor less intense | Decorative purposes only | Medicinal or culinary use |
| Seed Stage | Seed heads forming, stems woody, leaves yellowing | Saving seeds for next year | Harvesting for any other purpose |
The stem snap test is my go-to method for determining ripeness. Simply pinch a non-flowering stem between your thumb and forefinger about 2 inches from the base. If it snaps cleanly with a slight crunch, the plant is ready for harvest.
A bendy or mushy stem means it’s past its prime, while a too-hard stem indicates it’s not yet ready.
Seasonal timing is equally critical. In USDA Zone 6a, I harvest bee balm from late July through early September, avoiding the first frost (around October 15).
Early morning harvests yield the most potent flowers since essential oils are most concentrated after dew has evaporated but before the heat of the day. Always harvest on dry, sunny mornings to preserve flavor and prevent mold.
For medicinal uses, prioritize harvesting during the hottest part of summer (July-August) when thymol levels peak. If you’re growing bee balm for pollinators, leave at least 30% of flowers on the plant to support bee and butterfly populations.
I like to leave a few stems unharvested to ensure continuous blooms throughout the season.
Pro tip: Rotate your harvests to avoid over-stressing the plant. Never cut more than one-third of the stems at a time, and always harvest from the outer edges inward.
This encourages bushier growth and prolongs the blooming season. In my experience, a well-maintained bee balm plant can produce three harvest cycles in a single season if cared for properly.
After harvest, process bee balm quickly to lock in flavor and medicinal properties. For drying, hang stems upside down in a dark, well-ventilated space for 1-2 weeks. For fresh use, store in the fridge for up to 5 days.
Freezing leaves in ice cube trays is another great way to preserve their aromatic oils for later use in teas or culinary dishes.
Remember, the earlier you harvest, the more potent your bee balm will be. Whether you're growing it for garden beauty, herbal remedies, or culinary delights, mastering the stem snap test and bloom stage timing will elevate your harvests to a whole new level. Happy harvesting! 🌿
Step-by-step bee balm harvesting guide: tools, techniques, and preservation tips
Harvesting bee balm (Monarda spp.), especially when done correctly, unlocks its full potential for medicinal teas, vibrant bouquets, or dried arrangements. The key lies in precise timing and gentle handling—avoid bruising stems and prioritize peak bloom stages to preserve flavor and potency.
Whether you're using pruning shears or your hands, these techniques ensure a clean, sustainable harvest that keeps your plant thriving.
Start by gathering your harvesting tools: sharp pruning shears (for thick stems), a clean bucket with water to submerge stems immediately, and a paper towel for drying. Work on a dry, sunny morning when dew has evaporated—this minimizes moisture and prevents mold.
Pro tip: Wear gloves if you're sensitive to bee balm’s fuzzy leaves, which can irritate skin.
How to Harvest Bee Balm
- 1 Test stem readiness: Perform the stem snap test—gently pinch a stem between your fingers. If it snaps cleanly (not bends), it’s ready for harvest.
- 2 Cut at the right angle: Use clean pruning shears to snip stems at a 45-degree angle, 2–3 inches below the flower cluster. This encourages new growth and prevents disease.
- 3 Handle stems gently: Immediately submerge cut stems in cool water to prevent wilting. Avoid stacking stems to minimize bruising, which dulls flavor and color.
- 4 Dry for preservation: Lay stems on a paper towel-lined tray in a well-ventilated, dark space (like a closet) for 1–2 hours. For long-term storage, use a dehydrator at 95°F for 2–4 hours or hang bundles upside down in a dry, dark area for 1–2 weeks.
- 5 Store properly: Once fully dry, store flower heads in an airtight container away from light. Label with the harvest date—dried bee balm retains potency for 12 months if stored correctly.
Preserving bee balm’s vibrant color and medicinal compounds starts with proper drying techniques. Air-drying works best for small batches, while a dehydrator speeds up the process for larger harvests.
Set your dehydrator to 95°F (35°C) and arrange stems in a single layer to ensure even drying. Avoid high heat, which can bleach colors and degrade essential oils.
After harvesting, give your bee balm plant a little TLC to encourage regrowth. Trim any woody or damaged stems and fertilize lightly with a balanced 5-10-5 formula to support new blooms.
Bee balm is perennial in zones 4–9, so with proper care, it’ll reward you with years of harvests—just avoid cutting more than one-third of the plant at a time to prevent stress.
For culinary or medicinal uses, harvest leaves and flowers at the same time for a balanced flavor profile. Use dried flowers to make herbal teas or infuse oils for skincare remedies, while fresh leaves add a citrusy note to salads or pestos.
Just remember: never harvest after rain—wet stems attract mold and pests, ruining your harvest.
With these techniques, you’ll transform your bee balm harvest into a versatile, high-quality resource—whether for gardening displays, home remedies, or gifting. Happy harvesting! 🌷