
How To
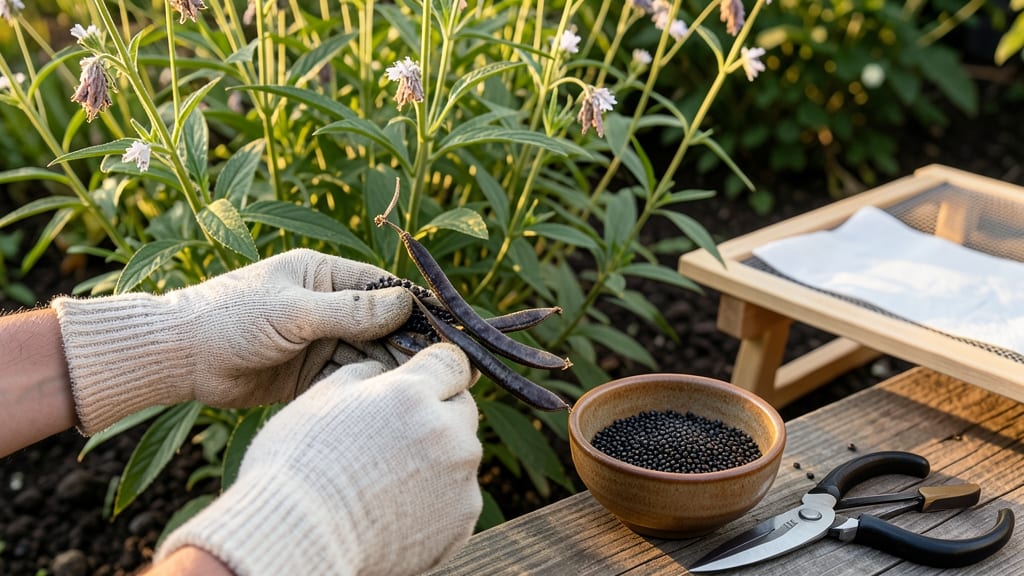
To harvest chia seeds at the perfect moment, watch for pods that crack open naturally when fully ripe—this is when the yield peaks and seeds stay intact.
Imagine spending weeks nurturing your 🌱 chia plants only to rush harvest season and lose half your seeds to wind or clumsy hands. The key isn’t just timing—it’s knowing the subtle cues that tell you exactly when to act.
Most gardeners miss the window because they focus on days-to-maturity instead of the visual and tactile signs: dried flower heads that rattle when shaken, stems turning crispy, and seeds that easily detach. These clues matter more than a calendar.
In this guide, I’ll walk you through the step-by-step process—from identifying ripe pods to drying and storing your seeds—so you end up with a high-yield harvest and none of the common mistakes that waste your hard work.
When and how to identify perfectly ripe chia pods for harvesting
Harvesting chia seeds at the right moment ensures a high-yield harvest with maximum nutritional value. The key lies in recognizing visual and tactile cues that signal perfect ripeness. Chia pods mature over 4-5 months, and missing these signs means losing seeds to scatter or spoilage.
Start monitoring your chia plants 3 months after planting when the first flowers begin to form. At this stage, pods are still green and firm—not ready for harvest. As they mature, you’ll notice subtle but critical changes in color, texture, and sound that indicate it’s time to act.
Here’s the summary-table of chia pod ripeness indicators to track daily:
The crack test is your foolproof method to confirm ripeness. Gently squeeze a pod—if it cracks open with minimal pressure and seeds spill out, it’s harvest-ready. This usually happens when pods turn a deep, uniform brown and stems feel dry and brittle to the touch.
Environmental factors like temperature drops and low humidity (common in late summer/early fall) accelerate ripening. In USDA Zone 6a, aim to harvest between August and October when mornings grow cooler. If humidity stays high, pods may mold before ripening, so prioritize harvesting during dry spells.
Check pods every 2-3 days once they turn brown. The morning is ideal—cooler temps reduce seed scatter risk. Use a magnifying glass to inspect pods closely; some may ripen faster than others. If you spot white mold or pests, harvest immediately, even if pods aren’t fully dry.
Never harvest based on flower color alone. Some chia varieties retain green hues even when seeds are ready. Always combine color, sound, and texture checks for accuracy. For example, my organic chia plants in full sun ripened faster than those in partial shade, despite identical care.
Pro tip: Shake plants gently over a white towel to spot-identify ripe pods. If seeds rain down, those branches are ready for harvest. This non-destructive test saves time and prevents over-mature pods from shattering on their own.
Timing your harvest correctly means the difference between a bountiful chia yield and wasted effort. By mastering these visual and tactile cues, you’ll ensure every seed is plump, nutritious, and ready for storage or use.
Step-by-step chia seed harvesting process to prevent waste
Harvesting chia seeds at the right time ensures you get the maximum yield while avoiding seed loss. Once your chia plants have dried completely and the pods begin to crack open naturally, it’s time to act.
The key is to harvest when the pods are fully mature but still intact—this prevents seeds from scattering into the soil or being lost to birds.
Start by gathering your harvesting tools: a pair of clean scissors or pruning shears, a large basket or tray lined with a cloth, and gardening gloves to protect your hands.
Work on a dry, sunny day to ensure the seeds stay dry during the process. Avoid harvesting after rain, as moisture can cause mold or premature seed release.
- 1 Gently twist and pull each mature chia pod from the stem. Avoid cutting stems too close to the base to prevent damage to the plant. Place pods directly into your lined basket to catch any seeds that may fall out.
- 2 Check for seed readiness by lightly squeezing a few pods. If seeds rattle loudly and the pod cracks easily, it’s ready. If not, leave it on the plant for another 1-2 days to mature further.
- 3 Spread pods on a clean surface like a towel or screen in a well-ventilated, dry area. Avoid direct sunlight to prevent overheating, which can damage the seeds. Let them dry for 3-5 days until completely crisp.
- 4 Separate seeds from chaff by rubbing the dried pods between your hands or using a fine-mesh sieve. Shake gently to release seeds while keeping the chaff behind. Discard any discolored or damaged seeds to ensure quality.
- 5 Store seeds in a cool, dark place like a glass jar or airtight container to preserve freshness. Label the container with the harvest date for tracking. Properly stored chia seeds can last up to 2 years without losing potency.
Avoid these common mistakes that lead to wasted seeds: harvesting too early (seeds won’t be fully mature), over-handling pods (causes premature cracking), or drying seeds in humid conditions (risks mold). Always work quickly but gently to minimize losses and maximize your harvest.
With this method, you’ll enjoy a bountiful chia seed harvest every season, ready for culinary use or storage. The satisfaction of harvesting your own seeds is unmatched—plus, you’ll always know they’re fresh and pesticide-free! 🌱