
How To
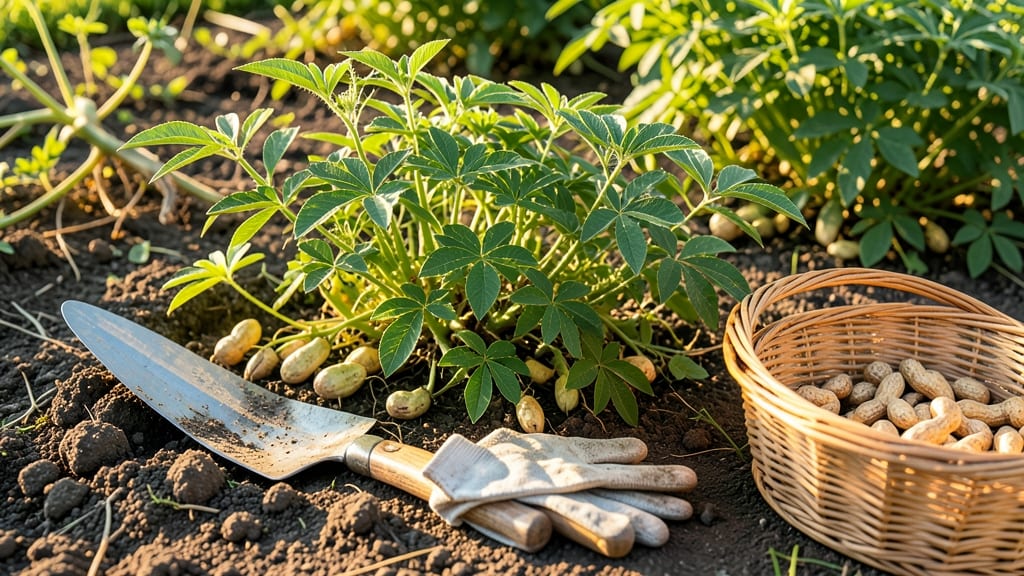
Harvesting groundnuts at the right time means the difference between a flavorful bounty and a bitter, shriveled mess—here’s how to nail it before the pods vanish underground.
Picture this: you’ve spent months nurturing your 🥜 groundnut plants, and now the vines are turning brown. But wait—harvesting too early means tough, unripe nuts, while waiting too long risks losing them to the soil. The key? Watch for yellowing leaves and pods that rattle when shaken.
In USDA Zone 6a, the ideal window is late September to October, but climate plays a role. Dry soil and crispy foliage signal readiness, while green pods mean more time is needed. Miss these cues, and you’re staring at wasted effort.
Below, I’ll walk you through the exact steps to harvest, dry, and store your groundnuts—plus the common mistakes that turn a great yield into a disappointment. Let’s get started.
How to identify when groundnut pods are ready for harvesting
Groundnuts—commonly known as peanuts—require precise timing for harvesting to ensure the best flavor and quality. Miss the window, and you risk bitter, shriveled pods or even complete crop loss.
The key lies in observing visual and tactile cues that signal maturity, combined with understanding how your local climate influences the process.
Unlike above-ground crops, groundnuts develop their edible pods underground, making them trickier to spot. However, several tell-tale signs appear above ground, including leaf yellowing and soil cracking.
These clues, paired with the 'twist test', will help you determine the perfect moment to harvest before the pods dry out in the soil.
| Sign | Description | Action Required |
|---|---|---|
| Pod Color | Dry, brown pods (not green) | Check for brown, papery shells |
| Leaf Condition | Yellowing and crispy leaves | 90% of leaves should turn yellow |
| Soil Cracks | Dry soil with visible cracks | Indicates pods are mature and dry |
| Twist Test | Pods twist off easily with slight pressure | Gently twist a pod—if it snaps off, it's ready |
| Vine Appearance | Brown, dry, and crispy vines | Harvest within 3-5 days of browning |
One of the most reliable visual cues is the color of the pods. When groundnuts are ready, their shells turn from green to dry brown. Unlike fresh green pods, mature ones feel hard and papery to the touch.
If you dig up a pod and it’s still green or soft, it’s not ready—wait another 1-2 weeks for full maturity.
Your local climate plays a huge role in harvest timing. In hot, dry climates, pods mature faster, often by late September. Meanwhile, cooler regions may need to wait until October or early November.
Always monitor soil moisture levels—too much water can delay ripening, while drought speeds it up.
Another critical sign is leaf yellowing. When about 90% of the leaves turn yellow and crispy, it’s a strong indicator that the pods below are ready. This process, called senescence, signals the plant is redirecting nutrients to the roots where the pods form.
Ignoring this cue can lead to overripe pods that shrivel or attract pests.
The 'twist test' is a simple but effective way to confirm ripeness. Gently grasp a pod and twist it—if it snaps off cleanly, it’s ready to harvest. If it resists or breaks unevenly, wait another 3-5 days.
This test works best on pods near the soil surface, as deeper ones may need more time.
Don’t overlook soil conditions. Cracked or dry soil is a clear signal that the pods have fully matured and are ready for harvest. If the soil is still moist, the pods may not be dry enough.
In humid climates, soil cracking might not occur, so rely more on the leaf color and twist test instead.
Harvesting too early results in small, bitter nuts, while waiting too long can lead to shriveled or moldy pods. Aim to harvest within 3-5 days of noticing these signs to maximize yield and quality. Once you’ve confirmed ripeness, it’s time to dig carefully to avoid damaging the pods.
🌱
Step-by-step groundnut harvesting techniques for maximum yield
Once your groundnut pods show signs of readiness—like crispy leaves and rattling pods—it’s time to harvest with care. The key is to dig up the plants before rain to prevent mold, but after the pods have fully matured underground.
I’ve found that harvesting on a dry, sunny morning gives the best results and preserves pod quality.
Gather your tools: a sturdy garden fork, gloves, a tarp or clean sheet, and a sharp knife for trimming. Avoid using a shovel, as it can damage the delicate pods. Work gently but efficiently, as groundnuts are shallow-rooted and can be easily dislodged.
-
1Loosen the soil around the base of the groundnut plants using a garden fork. Insert the fork 2-3 inches away from the stems and gently pry the soil upward to avoid cutting the vines.
-
2Gently pull the plants upward by the stems. If resistance is met, use the fork to loosen more soil—never force it, as this can crush the pods. Lay the plants on the tarp to dry.
-
3Shake the soil off the roots and vines by gently tapping them over the tarp. Avoid vigorous shaking, which can disrupt the pods. Brush away any remaining dirt with your hands or a soft brush.
-
4Trim the vines just above the pods using a sharp knife or pruners. This makes it easier to handle and dry the harvest. Discard any damaged or moldy pods immediately to prevent spoilage.
-
5Spread the plants in a single layer on a dry, shaded surface (like a porch or garage floor) to air-dry for 3-5 days. Avoid direct sunlight, which can overheat and discolor the pods.
-
6Once the pods are completely dry and the vines are brittle, shell the nuts by hand. Store them in a cool, dry place (like a glass jar or mesh bag) to maintain freshness for up to 6 months.
After harvesting, I always inspect the pods for any signs of mold or pests. Discard any that feel soft or smell off, as these can ruin the entire batch. Proper drying is critical—moisture-laden pods are prone to mold, which can turn your harvest into a soggy mess.
For large-scale harvests, consider using a mechanical groundnut digger to save time, but always follow up with manual inspection to ensure no pods are missed or damaged. The goal is to preserve quality while maximizing your yield, and a little extra care at harvest time pays off big time.
Finally, don’t forget to rotate your planting area next season to prevent soil-borne diseases. Groundnuts are heavy feeders, so replenish the soil with compost or organic matter before replanting. Happy harvesting! 🥜