
How To
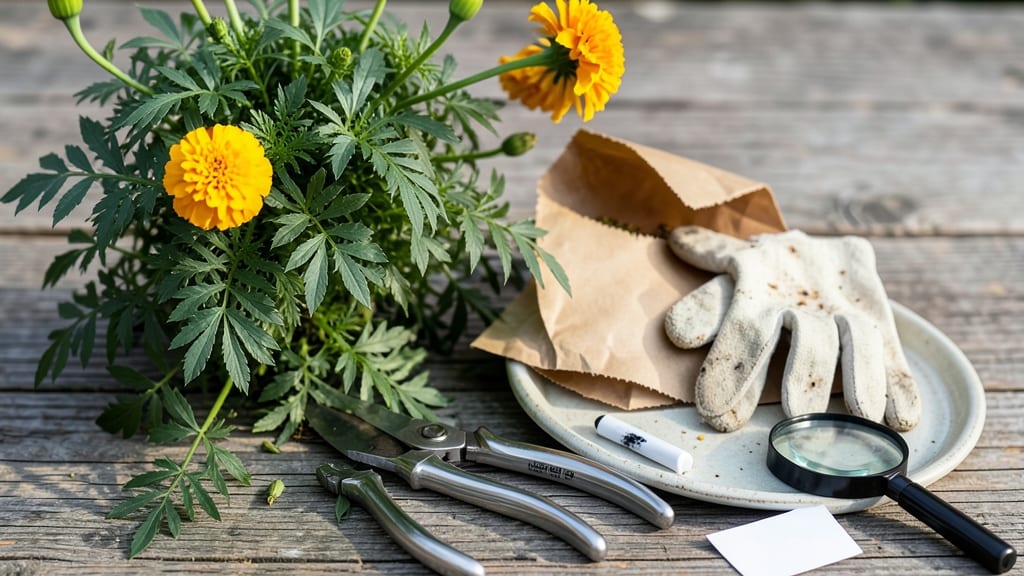
Harvesting marigold seeds at the right time ensures you save the best seeds for next year’s garden—here’s exactly how to tell when those pods are ready.
Marigolds aren’t just beautiful garden companions—they’re powerhouses for seed-saving, attracting pollinators, and even repelling pests. But harvesting their seeds at the perfect moment ensures strong, viable seeds for next year’s garden.
Timing is everything, and knowing when those pods turn brown and dry is the key to success. Too early, and you’ll end up with seeds that won’t sprout; too late, and they might scatter or spoil.
In this guide, I’ll walk you through how to spot perfectly dry seed pods, collect them without wasting a single seed, and store them for long-term use—so you’re ready to replant with confidence.
When to harvest marigold seeds: identifying perfectly dry seed pods
Harvesting marigold seeds at the right time ensures you capture viable seeds for next year's garden. The key is waiting until the seed pods are completely dry and brown—a process that takes 4-6 weeks after flowering.
If you harvest too early, the seeds won’t germinate well, and if you wait too long, they may scatter or attract pests like aphids.
Start by observing your marigold plants after the bright orange or yellow flowers fade. The seed heads will begin as green pods, gradually turning brown as they mature.
This transformation is your first clue that harvest time is near. Pay close attention to the pod texture and listen for subtle sounds that signal readiness.
| Stage | Pod Color | Texture | Sound | Action |
|---|---|---|---|---|
| Early Stage | Green | Firm | None | Wait 4-6 weeks |
| Mid Stage | Brownish-green | Slightly papery | Muffled rattle | Monitor daily |
| Ready to Harvest | Fully brown | Papery, cracks easily | Loud rattle | Harvest immediately |
When the seed pods are fully brown and dry, they’ll feel lightweight and brittle, almost like dried paper. Gently squeeze a pod—if it cracks open with minimal pressure, it’s ready.
You’ll also hear seeds rattle inside when you shake the pod near your ear. This is your final confirmation that the seeds are mature and ready for collection.
Environmental factors play a big role in drying time. If your summer is hot and dry, pods may mature faster, while cool, humid weather can slow the process.
In humid climates, watch for signs of mold or rot—if pods feel damp or develop fuzzy growth, harvest them immediately to prevent spoilage, even if they’re not fully dry.
Timing your harvest correctly also depends on your marigold variety. French marigolds (like 'Bonanza') typically mature faster than African marigolds (like 'Tangerine'). Always check the back of your seed packet for days to maturity guidelines, as this can vary by 3-5 weeks between types.
One common mistake is harvesting seeds on rainy days, which can introduce moisture and reduce viability. Aim to collect seeds on a sunny morning when humidity is low.
Cut the entire seed head with a clean pair of pruners and lay it on a paper bag or newspaper to dry indoors for an extra day if needed.
If you miss the perfect window, don’t worry—marigolds are resilient. Seeds can remain viable in the pod for 1-2 weeks past full maturity, though germination rates may drop slightly. Store any leftover pods in a cool, dry place until you’re ready to process them.
Once you’ve confirmed the pods are ready, the next step is to gently crush them to release the seeds. Place the dried pods in a paper bag and shake vigorously, or rub them between your fingers over the bag. This method ensures you capture every seed without damaging them.
Pro tip: Label your seed packets with the harvest date and marigold variety. This helps track germination rates over time and ensures you’re planting the best seeds for your climate. With practice, you’ll develop an eye for spotting perfectly dry marigold pods every season!
Step-by-step process for collecting and storing marigold seeds
Once your marigold seed pods reach the perfect brown and dry stage, it’s time to harvest them carefully to preserve seed viability. The process is simple but requires patience—rushing can lead to immature seeds that won’t germinate.
Gather your tools, like a pair of clean pruning shears or scissors, a paper bag for collection, and a dry workspace to avoid moisture exposure.
Harvesting at the right moment ensures you’ll have high-quality seeds ready for next season’s garden. If you miss the window, the pods may crack open on their own, scattering seeds everywhere. Timing is everything—wait until the pods are completely dry and paper-thin before touching them.
This usually happens 4-6 weeks after flowering, depending on your climate.
Step-by-Step Guide to Harvesting Marigold Seeds
- Step 1: Gently twist or snip the dry seed pods from the stem using clean shears. Avoid damaging the pods.
- Step 2: Place the pods in a paper bag (not plastic!) to allow airflow and prevent mold.
- Step 3: Let the pods dry further in a warm, dry place (like a sunny windowsill) for 3-5 days.
- Step 4: Once fully dry, crack open the pods with your fingers or a small hammer to release seeds.
- Step 5: Store seeds in an airtight container with a silica gel packet to absorb moisture.
After harvesting, the next critical step is proper drying. Spread the pods on a clean, dry surface in a well-ventilated area away from direct sunlight. Too much heat can overdry the seeds, reducing their germination rate.
If you’re short on time, a paper bag works well—just tie it loosely to allow airflow. Avoid plastic bags, as they trap moisture and encourage mold growth.
Once the seeds are completely dry, remove them from the pods by gently crushing them with your fingers or rolling a small pin over the pods. This method ensures you capture every viable seed without damaging them.
Store the seeds in a labeled envelope or small container, and keep them in a cool, dark place like a pantry or seed vault. Proper storage can extend their viability for up to 3 years.
Labeling your seeds is a game-changer for organization. Include the variety name, harvest date, and any notes about germination tests you plan to conduct. This way, you’ll know exactly what you’re planting next season and can track which varieties perform best in your garden.
A little effort now saves frustration later!
If you’re unsure whether your seeds are fully viable, conduct a simple germination test before storing them long-term. Place a few seeds between damp paper towels in a sealed bag, then wait 7-10 days to see if they sprout.
This quick check gives you peace of mind and helps you plan your next planting with confidence. 🌱