
How To
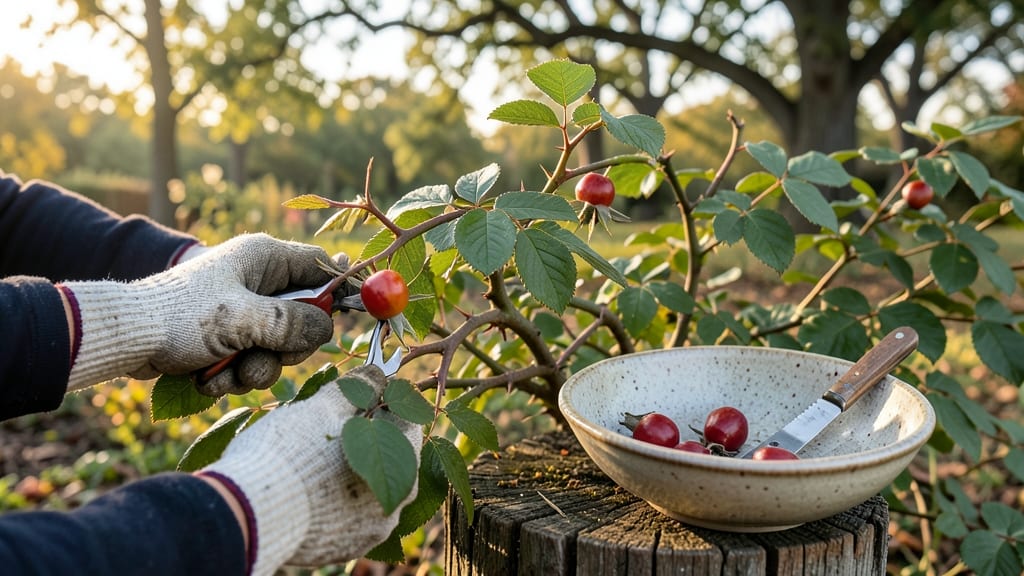
Harvesting rose seeds from dried hips is your backdoor pass to growing rare, heirloom roses—if you know when and how to collect them.
Did you know that harvesting rose seeds from dried hips can unlock a treasure trove of heirloom roses—if you time it right? The secret lies in knowing exactly when those hips turn brown and crispy for successful seed collection.
Most gardeners skip this step, assuming it’s too tricky or unreliable. But with the right timing—late fall to winter, when hips are deep red and firm—you can extract viable seeds that’ll sprout into stunning new varieties. The key? Patience and attention to detail.
In this guide, I’ll walk you through every step: from spotting the perfect hips to extracting, drying, and storing seeds for the best germination rates. Ready to grow roses from scratch?
When to harvest rose hips for maximum seed viability
Timing your rose hip harvest is everything when it comes to collecting viable seeds. The best time to harvest is after the first frost when hips turn from deep red to brown and crispy.
This usually occurs in late fall to winter, depending on your USDA hardiness zone. In Zone 6a, I aim to harvest between October and December—just before the hips shatter or fall to the ground.
Watch for visual cues like wrinkled skin and a dry rattle when shaken. These signs indicate the seed maturity needed for successful germination. If you miss this window, seeds may lose viability or become contaminated from ground contact.
For example, my David Austin English roses always develop plump, brown hips by November, ready for collection.
Climate plays a huge role in timing. In warmer zones (7b+), hips may mature earlier, while colder zones (5a-) could delay harvest until late winter. I’ve found that hybrid teas and climbing roses often mature hips faster than shrub roses, so adjust your schedule accordingly.
Always prioritize dry, frost-free days for harvesting to prevent mold.
| Stage | Hip Appearance | Seed Condition | Best Action |
|---|---|---|---|
| Early Fall | Deep red, firm | Light brown, soft | Wait 4-6 weeks |
| Late Fall | Brown, wrinkled | Dark brown, plump | Harvest immediately |
| Winter | Dry, papery | Shriveled, non-viable | Discard or compost |
🌱 Key Harvest Window: Late Fall (Brown & Crispy)
Don’t confuse ripe hips with overripe ones. Overripe hips split open, exposing seeds to pests and moisture, which can reduce viability. I always check hips by gently squeezing them—if they give slightly and feel hollow, they’re ready.
For wild roses, this happens earlier (September-October), while garden varieties may wait until November.
Remove hips carefully using clean pruners or by hand to avoid damaging the plant. Place them in a paper bag to dry further indoors. Avoid plastic bags, as they trap moisture and encourage mold.
I’ve had the best luck with hips that dry naturally on the plant until they’re completely brown before bringing them inside.
If you’re in a humid climate, accelerate drying by placing hips on a screen or mesh tray in a well-ventilated area. This prevents fungal growth, which can ruin your seed collection.
In drier climates, hips may dry faster outdoors, but bring them in at night to protect from dew and frost.
Pro tip: Label your hips by rose variety and harvest date. This helps track which seeds perform best during germination. I use small paper tags tied to branches before collecting hips. For example, my ‘Gertrude Jekyll’ rose hips always yield the highest germination rate when harvested in early November.
Once hips are fully dry, store them in a cool, dark place until you’re ready to extract seeds. I use glass jars with silica gel packets to maintain low humidity.
Remember, freshness matters—seeds lose viability faster in warm conditions. Never store hips in the refrigerator, as the moisture can cause spoilage.
Harvesting at the right time ensures you’ll have healthy, viable seeds ready for stratification. Whether you’re growing heirloom roses or experimenting with hybrids, precise timing is your ticket to a thriving rose garden next spring.
With practice, you’ll develop an eye for the perfect harvest moment—just like I have after years of trial and error. 🌹
Step-by-step guide to extracting clean rose seeds from dried hips
Once your rose hips are deep red and firm—typically after the first frost—it’s time to extract those precious seeds. The process is simpler than you think, but timing and technique make all the difference.
I’ve harvested seeds from hundreds of hips over the years, and I’ll share my foolproof method to avoid moldy seeds or wasted effort.
Start by gathering your dried rose hips in a paper bag. Let them sit in a warm, dry spot for 1-2 weeks to fully dry out. This step is crucial because damp hips can rot during extraction, ruining your seeds.
If you’re impatient, a sunny windowsill speeds up the process, but avoid direct sunlight for more than a few hours to prevent cracking.
🌱 Step-by-Step Extraction Process
-
Step 1: Crack Open the Hips
Place hips in a paper towel and gently crush them with a rolling pin or hammer. Avoid metal tools to prevent seed damage. -
Step 2: Separate Seeds and Flesh
Sift the crushed mixture through a fine mesh sieve to separate seeds from pulp. Discard any mushy or discolored bits—these won’t germinate. -
Step 3: Ferment for Clean Seeds
Mix seeds with water in a jar and let sit for 3-5 days. The good seeds sink; skim off moldy or floating debris daily. -
Step 4: Rinse and Dry
Rinse seeds with clean water, then spread them on a paper towel to air-dry for 2-3 days in a shaded spot. -
Step 5: Store for Stratification
Place dried seeds in a paper envelope and refrigerate for 4-6 weeks to break dormancy before planting.
During fermentation, mold is the biggest enemy. If you see fuzzy growth, discard those seeds immediately. I once lost a batch because I didn’t monitor the jar closely enough—learn from my mistake!
After rinsing, inspect each seed for dark brown color and plumpness. Shriveled or light-colored seeds won’t sprout, so toss them.
Pro tip: Label your seeds with the rose variety and harvest date. I use small brown paper tags tied with twine—it’s simple and effective. Store them in a cool, dark place until you’re ready to stratify. Patience here pays off, as proper stratification can double your germination rates.
Once dried, your seeds are ready for cold stratification. This mimics winter conditions, tricking seeds into thinking spring has arrived. Place them in a moist paper towel inside a sealed bag, then refrigerate. In 6-8 weeks, they’ll be primed for planting—just like nature intended.
With these steps, you’ll go from dried hips to viable seeds in just a few weeks. Now you’re ready to grow roses from scratch, just like the old-time gardeners did. Happy harvesting! 🌹