
How To
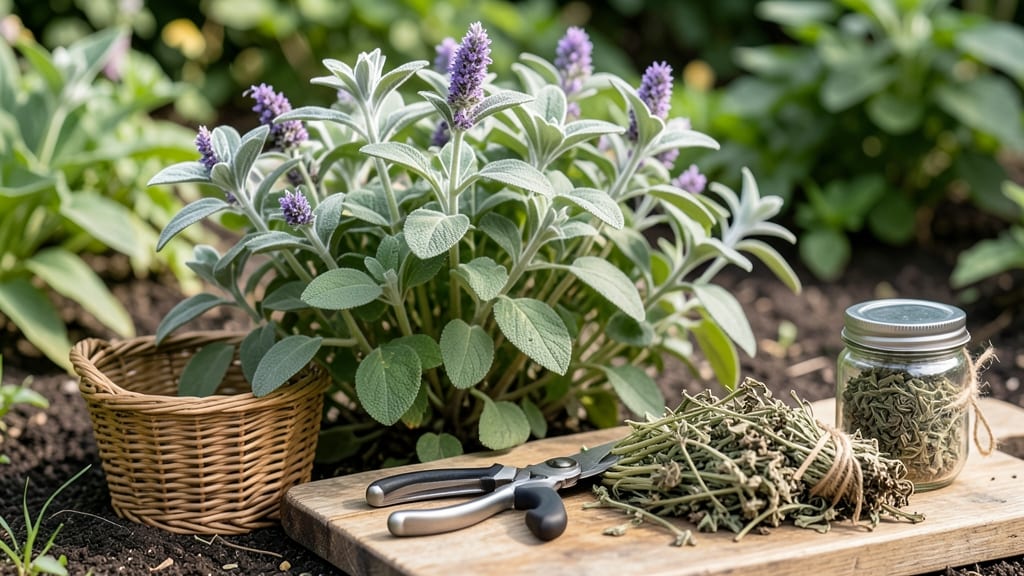
Harvesting sage for winter preserves its earthy flavor and keeps your kitchen stocked with a versatile herb 🌿—all it takes is timing, the right tools, and a few simple drying tricks.
Picture this: you’ve just pulled a handful of fragrant sage leaves from your garden, and now you want to save that fresh taste for winter soups, stuffing, or homemade seasoning blends.
The key is knowing when to pick and how to dry it properly—because skipping these steps can leave you with dull, brittle leaves that lose their magic.
In this guide, I’ll walk you through the best time to harvest sage (late summer to early fall, before the first frost), the tools you’ll need, and step-by-step drying methods—whether you’re air-drying bundles or using your oven for faster results.
No more wasted harvests or flavorless herbs gathering dust in your pantry!
By the end, you’ll have a stash of flavor-packed sage ready for winter cooking, crafts, or even homemade remedies—plus tips to avoid common mistakes like moldy bundles or lost aroma. Let’s get started!
Best time and method to harvest sage for long-term storage
Timing your sage harvest is key to preserving its earthy flavor and ensuring healthy regrowth. The ideal harvest window for winter storage is late summer to early fall, just as the plant enters dormancy but before the first frost.
This timing captures the peak aromatic oils while avoiding the woody stems that develop later in the season.
For established plants, I recommend harvesting after the first flush of flowers has passed but before the leaves turn yellow. This ensures the leaves are fully mature with maximum flavor intensity.
If you miss this window, you can still harvest younger leaves throughout the growing season, though they’ll have a milder taste. The goal is to balance regrowth and storage needs.
Harvesting method directly impacts drying efficiency. Always use clean, sharp pruning shears to cut stems at a 45-degree angle, about 1-2 inches above a leaf node. This promotes healthy regrowth while preventing disease. Avoid tearing leaves, which can damage the plant and reduce storage quality.
Select stems that are fully developed but not yet flowering. The best candidates are 3-4 inches long with gray-green, velvety leaves. Bundle stems together with twine or rubber bands, leaving the cut ends exposed for optimal airflow during drying.
This simple step prevents mold and speeds up the process.
🌿
| Harvest Stage | Key Characteristics | Best Practices |
|---|---|---|
| Early Season | Small leaves, mild flavor, not ideal for storage | Harvest lightly for regrowth; avoid heavy pruning |
| Peak Season | Fully developed leaves, strong aroma, gray-green color | Harvest stems 3-4 inches long; bundle for drying |
| Late Season | Woody stems, dull leaves, reduced flavor | Harvest only young growth; prioritize early-season storage |
| Dormancy | No new growth, leaves may yellow or die back | Avoid harvesting; protect plants from frost |
To maximize harvest efficiency, I recommend a two-step pruning approach. First, harvest the outer stems to encourage bushier growth. Then, in late summer, focus on the inner stems for your winter stash.
This method ensures your sage plant remains healthy and productive while yielding the most flavorful leaves for storage.
Always harvest on a dry, sunny morning to allow dew to evaporate and prevent mold. If rain is forecasted, delay harvesting until the weather clears. Wet leaves can lead to browning or spoilage during the drying process, ruining your hard work.
A quick shake of the stems can also remove dust or pests before drying.
For large-scale harvesting, divide your sage plants into sections and harvest every 2-3 weeks during peak season. This staggered approach prevents overharvesting and ensures a consistent supply of fresh sage for both immediate use and storage. Label your bundles with the harvest date to track freshness.
After harvesting, trim the stems to remove any damaged or yellowing leaves. These can harbor bacteria and reduce the quality of your dried sage. A quick inspection under bright light helps identify any hidden issues before the drying process begins. This step is especially important for long-term storage quality.
🌱
If you’re harvesting sage for the first time, start small with 2-3 plants to perfect your technique. Sage is perennial in many climates, so a well-maintained plant can provide harvests for years to come.
With the right timing and methods, you’ll enjoy homegrown sage that rivals store-bought—with a depth of flavor that’s unmatched.
Step-by-step guide to drying sage at home for maximum flavor
Once you’ve harvested your sage leaves at the perfect time—just before flowering—preserving them properly ensures you’ll have flavorful herbs all winter. Drying sage at home is simple, but the method you choose (air-drying or oven-drying) can drastically affect flavor and potency.
Let’s dive into the best techniques to lock in that earthy aroma for up to 12 months.
Air-drying is the traditional method and requires minimal equipment, while oven-drying speeds up the process. Both methods work well, but oven-drying is ideal if you’re short on time or live in a humid climate.
Regardless of your choice, proper drying prevents mold and preserves the aromatic oils that make sage so special in cooking and crafts.
How to Harvest Sage for Winter
- 1 Choose healthy stems: Select woody stems with fully developed leaves and a strong aroma. Avoid stems with yellowing or damaged leaves.
- 2 Trim leaves: Use clean pruning shears to cut stems into 4-6 inch bundles. Remove any lower leaves that might touch damp surfaces during drying.
- 3 Bundle stems: Gather 5-6 stems and tie them tightly with twine or rubber bands at the top and middle to form a bundle. This creates airflow for even drying.
- 4 Hang bundles: Suspend bundles upside down in a dry, dark, and well-ventilated space (like a closet or pantry). Ensure they’re at least 6 inches apart to prevent mold.
- 5 Dry completely: Sage is fully dried when leaves crush easily and the stems snap (not bend). This typically takes 2-4 weeks, depending on humidity.
For oven-drying, preheat your oven to 200°F (93°C) and spread leaves on a baking sheet lined with parchment paper. Bake for 1-2 hours, stirring occasionally, until completely dry. This method preserves flavor quickly but requires close monitoring to avoid overheating.
Once dried, strip the leaves from the stems and store them in airtight containers like glass jars or resealable bags. Keep them in a cool, dark place away from direct sunlight to maintain their potency. Label your containers with the harvest date to track freshness.
With these methods, your homemade dried sage will retain its rich flavor for up to 12 months, ready to elevate your winter dishes, herbal teas, or craft projects. Happy drying! 🌿