
How To
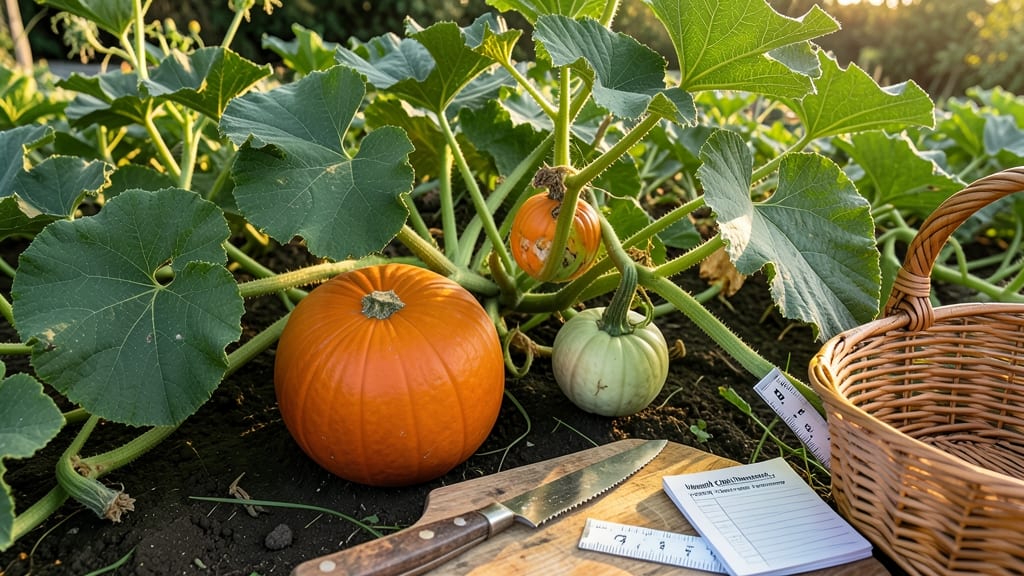
Knowing when to harvest pumpkins means catching them at peak ripeness—when the skin hardens, the stem snaps, and the color deepens to a rich, uniform hue 🎃.
Picking too early leaves you with bitter, watery flesh, while waiting too long risks frost damage or rot. Even experienced gardeners sometimes miss the window, leading to wasted effort and disappointment.
In this guide, I’ll walk you through the 5 foolproof signs your pumpkin is ready, from the classic stem-snap test to subtle color shifts and rind hardness. You’ll also learn how variety matters—whether you’re growing a carving-sized jack-o’-lantern or a sweet, spiced pie pumpkin.
By the end, you’ll confidently harvest pumpkins at their best, store them properly, and avoid the most common mistakes that turn a great crop into a garden flop.
5 Visual & physical signs your pumpkin is ready for harvest
Harvesting pumpkins at the perfect moment transforms your garden into a bounty of sweet, flavorful fruit. But timing is everything—wait too long, and you risk overripe flesh or rotting; pick too early, and you’ll end up with bland, underdeveloped pumpkins.
The key lies in visual and physical cues that signal peak ripeness. These signs ensure your pumpkins are ready for carving, baking, or long-term storage, whether you're growing Jack-O'-Lantern varieties or pie pumpkins.
I’ve learned the hard way that relying on days-to-maturity alone isn’t enough—environmental factors like temperature, humidity, and daylight can shift ripening timelines. That’s why I pay close attention to five critical indicators before reaching for my pruning shears.
These signs work for all pumpkin types, from tiny sugar pumpkins to massive Atlantic Giants. Mastering them guarantees a harvest that’s sweet, firm, and perfect for your intended use.
-
1. Stem Snaps Easily When Bent
The stem should break cleanly with a slight twist or bend—no resistance. If it snaps dryly, your pumpkin is ready. A green, flexible stem means it needs more time. -
2. Rind Is Hard Enough to Resist Fingernails
Press your fingernail into the skin near the blossom end. If it doesn’t puncture easily, the rind is tough enough. A soft or yielding skin means the pumpkin isn’t fully matured. -
3. Color Is Deep and Uniform
Look for consistent color with no green patches. Some varieties (like Cinderella) stay green at the stem; these should have a matte, dry texture instead of glossy skin. -
4. Fruit Feels Heavy for Its Size
A ripe pumpkin is dense and heavy relative to its size. Lift it—if it feels light for its dimensions, it’s not fully developed yet. -
5. Vine Near the Fruit Begins to Die Back
The vine closest to the pumpkin should yellow and wither. This signals the plant is redirecting energy to ripening the fruit.
Let’s start with the most reliable sign: the stem test. I’ve found that this is the first indicator I check because it’s foolproof. When the stem dries out and snaps easily, it’s nature’s way of telling you, “It’s time!”
I always test this in the morning when the stem is firmest. A green, pliable stem means your pumpkin needs at least another week to mature. Pro tip: If the stem is still attached but dry, you can harvest with a 3-inch stem stub—this helps the pumpkin cure properly.
The rind hardness test is my backup method, especially on cloudy days when stems might feel deceptive. Use your fingernail to press the skin near the blossom end—the softer spot. If you can’t dent it easily, the pumpkin is ready.
I’ve seen gardeners mistake semi-hard rinds for readiness, only to find the flesh still underdeveloped. For carving pumpkins, aim for a rind that’s nearly impossible to puncture with your thumbnail.
Color changes are often overlooked, but they’re a clear visual cue for ripeness. A fully mature pumpkin should have deep, consistent coloration with no green patches. Some heirloom varieties, like Long Island Cheese, develop a creamy yellow hue, while others turn orange or white.
Pay extra attention to the blossom end—if it’s still green, the pumpkin isn’t ready. I once harvested a Cinderella pumpkin too early because I ignored the green stem; the flesh was watery and bland.
Don’t underestimate the power of weight as a ripeness indicator. A ripe pumpkin feels surprisingly heavy for its size. Lift it in your hands—if it’s light and hollow-sounding, it’s not ready. This test works especially well for giant pumpkin varieties, where size can be deceiving.
I compare pumpkins of the same variety side by side; the heavier one is always the ripest. For pie pumpkins, this test helps ensure sweet, dense flesh perfect for baking.
Finally, watch the vine’s behavior near your pumpkin. When the vine closest to the fruit yellows and dies back, it’s a sign the plant is focusing its energy on ripening. This is nature’s way of saying, “I’ve given what I can.”
I’ve noticed that in hot, dry climates, vines die back faster, so I harvest a few days earlier than in cooler regions. If the vine is still green and vigorous, your pumpkin needs more time.
Timing your harvest correctly also depends on your climate and pumpkin variety. In USDA Zone 6a, where I garden, I aim to harvest by late September to avoid early frost damage. But in warmer zones (8b+), pumpkins can mature later.
Always check your local frost dates—if frost is forecast within a week, harvest even if the pumpkin isn’t perfect. You can cure it indoors to improve flavor and shelf life.
One common mistake I see is harvesting by size alone. Just because a pumpkin looks big doesn’t mean it’s ripe. I’ve seen 50-pound giant pumpkins with soft rinds because they were harvested too early for their weight.
Always combine size, color, stem condition, and rind hardness for the best results. For smaller varieties, like sugar pumpkins, size is a better indicator since they mature faster.
Once you’ve confirmed all five signs, it’s time to harvest! Use a sharp pruning shear or knife to cut the stem, leaving a 3-inch stub. Avoid pulling pumpkins from the vine—this can damage the skin and reduce storage life.
After harvesting, let your pumpkins cure in a dry, shady spot for 7–10 days. This hardens
When to harvest pumpkins by variety: Jack-o'-lantern vs. pie pumpkins vs. giant types
Not all pumpkins ripen on the same schedule, and harvesting too early or late can ruin your Halloween decorations or pie recipes. Jack-O'-lantern varieties need different care than pie pumpkins or giant types, with varying maturity timelines and size expectations.
Understanding these differences ensures you pick pumpkins at their peak—whether for carving, baking, or showcasing.
For example, Cinderella pie pumpkins mature in just 85-90 days, while Atlantic Giant varieties can take up to 120 days to reach their massive 100+ pound size. Even the color maturity varies—some stay green until fully ripe, while others develop their signature hues weeks earlier.
Let’s break down the key differences so you can time your harvest perfectly.
Pie pumpkins like Sugar Pie or Cinderella are the fastest to mature, making them ideal for gardeners with shorter growing seasons. Their sweet, dense flesh is best when harvested slightly earlier than carving varieties—aim for a firm but not rock-hard rind to preserve flavor. Overripe pie pumpkins develop a woody texture and bitter taste, so timing is everything.
On the other hand, giant pumpkins like Atlantic Giant or Mammoth Gold require patience. These monsters need full summer growth to reach their potential, and harvesting too soon means underdeveloped flesh and structural weaknesses.
Wait until the stem collapses under gentle pressure—a sure sign the pumpkin has reached its peak size and flavor.
For Jack-O'-lantern varieties, focus on color uniformity and rind thickness. A pumpkin ready for carving should have a deep, consistent hue (no green patches) and a rind that’s too tough to puncture with your thumbnail.
If you’re unsure, give it a few more days—overripe pumpkins last longer in storage but may develop soft spots.
Pro tip: Use a sharp pruning shear to cut stems, leaving a 2-inch stem attachment to extend shelf life. Store pumpkins in a cool, dry place with good airflow—this applies to all varieties, whether you’re saving them for Halloween decorations or winter baking. 🎃