
How To
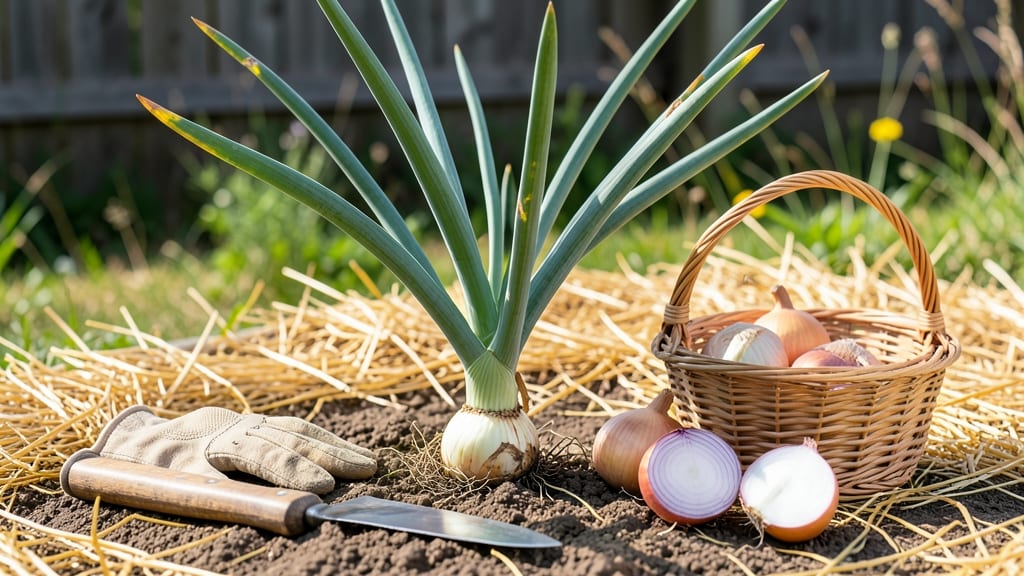
Harvesting onions at the right time ensures sweet, flavorful bulbs instead of bitter, overgrown disappointments—here’s how to know when your 🧅 are ready.
Picture this: you’ve nurtured your onions all season, only to pull them too early and end up with small, pithy bulbs, or too late and watch them split or rot in the soil.
The difference between these outcomes comes down to timing, and the good news is, nature gives you clear signals.
You don’t need a gardening degree to spot the perfect moment—just keep an eye on three key visual cues: when the tops turn yellow and flop over, when the bulbs feel firm and dry to the touch, and when the neck between the bulb and the leaves starts to shrink and turn papery.
These signs mean your onions are at their peak flavor and storage potential.
In this guide, I’ll walk you through how to read these signals, harvest properly for maximum yield, and adjust your timing based on your climate zone. By the end, you’ll never second-guess when to pull your onions again.

3 Clear visual signs your onions are ready for harvesting
Knowing exactly when to harvest your onions can transform your garden from a bitter disappointment to a flavorful triumph. The difference often comes down to recognizing subtle but critical visual cues that signal peak ripeness.
If you miss these signs, your onions may become overmature, developing tough skins or hollow centers that ruin both taste and storage potential.
I’ve learned through years of gardening that the best onion harvests happen when you pay attention to three key visual indicators: the color of the foliage tops, the firmness of the bulbs themselves, and the condition of the neck where the bulb meets the leaves.
These signs work together like a checklist to ensure you’re harvesting at the perfect moment for maximum flavor and shelf life.
Here’s what to look for—each of these three visual clues acts as a green light that your onions are ready to be pulled from the soil. Ignoring even one can mean the difference between sweet, crisp onions and tough, pungent ones that store poorly.
🧅 Your Onion Harvest Checklist
-
1. Yellowing & Falling Tops
Look for straw-colored or yellow foliage that naturally flops over. This signals the plant is redirecting energy to the bulb, not the leaves. -
2. Firm, Dry Bulbs
Gently squeeze the bulb—it should feel solid and papery, not soft or moist. Overly wet bulbs won’t store well. -
3. Shrinking Neck
The stem where the bulb meets the leaves should tighten and turn brown. This "neck-down" phase means the bulb is mature.
Pro Tip: Harvest on a dry, sunny day to speed up curing—this prevents rot and extends storage life.
Let’s break down each of these signs in more detail so you can confidently identify when your onions are at their peak. The first clue—yellowing tops—is often the easiest to spot from a distance.
When the green leaves start turning golden and flopping over, it’s nature’s way of telling you the bulb below is fully developed and ready for harvest.
I’ve made the mistake of waiting too long for this sign, thinking the onions needed more time. But those extra days in the ground can lead to hollow centers or even bolting (when onions send up flower stalks), which ruins the bulb entirely.
The key is to act as soon as you see that telltale color change—usually about 10-14 days after the tops yellow.
The second visual cue—firm, dry bulbs—requires a bit more hands-on checking. Dig up one onion and gently squeeze it. If it feels solid like a small ball and the skin is papery rather than slick, it’s ready.
Soft or moist bulbs mean they need more time, while bulbs that feel too hard might be overripe. This test is especially important for storage onions, which need that perfect balance of dryness to last through winter.
Don’t overlook the neck separation between the bulb and the leaves. This is the third and final visual signal that your onions are ready.
When the neck starts to shrink and turn brown, it’s a clear indication that the bulb has stopped growing upward and is now focused on maturing. This is your last chance to harvest before the bulb’s quality declines.
I like to check this by gently pulling back the outer leaves to peek at the neck—it’s a quick way to confirm readiness without digging up the entire plant.
One common mistake I see gardeners make is assuming all onions mature at the same time. In reality, different varieties and even onions in the same patch may ripen at slightly different rates. That’s why it’s smart to check your onions every few days once the tops start yellowing.
This way, you can harvest them as they’re ready rather than waiting for the entire batch to mature simultaneously.
Finally, timing your harvest with the weather can make or break your onion crop. Aim to harvest on a dry, sunny day with temperatures between 60°F and 75°F. This ideal weather helps the bulbs cure properly after harvesting, which is crucial for long-term storage.
If rain is in the forecast, it’s better to harvest a few days early—wet conditions can lead to rot during curing.
By paying attention to these three clear visual signs—yellowing tops, firm bulbs, and a shrinking neck—you’ll know exactly when to harvest your onions for the best flavor and storage life. The next step?
Learning how to properly cure and store them, but that’s a topic for another guide. For now, keep your eyes on those plants and enjoy the satisfaction of a perfectly timed harvest! 🌱
How to harvest onions properly: step-by-step for maximum yield
Once your onions show those perfect harvesting signs, timing and technique become critical. A rushed or improper harvest can lead to shriveled bulbs or even rot. The key is patience—waiting for the right moment ensures flavorful, storable onions that last all winter.
I’ve learned that skipping these steps often means sacrificing quality, so let’s dive into the proven process.
You’ll need just a few essential tools for a smooth harvest: a sharp garden fork or spade, heavy-duty gardening gloves, and a clean cutting board for trimming.
Avoid using your hands to pull bulbs—this can damage the delicate skins. Trust me, I’ve made that mistake and ended up with bruised onions that spoiled faster.
Now that you’re ready, let’s walk through the exact steps to harvest, cure, and store your onions like a pro. Each stage is crucial for preserving that fresh, sweet flavor you’ve worked so hard to cultivate.
🌱 Step-by-Step Onion Harvest Process
- Step 1 Choose a dry, sunny day (60-70°F) to harvest. This prevents soil from sticking to the bulbs and promotes faster drying. Avoid rainy weather—wet onions won’t cure properly.
- Step 2 Use a garden fork to gently loosen the soil around the onion bulbs. Work the fork in a circular motion about 6 inches from the plant. This prevents damaging the bulbs while freeing them from the soil.
- Step 3 Grasp the green tops and pull upward firmly to remove the onion from the soil. If the bulb resists, use the fork to pry it free—never twist or yank, as this can cause bruising.
- Step 4 Shake off excess soil and trim the roots to about ½ inch. Leave the green tops attached—they help draw moisture from the bulb during curing. Pro tip: Save the best tops for replanting next year!
- Step 5 Lay the onions in a single layer on a screen or mesh rack in a well-ventilated area. Avoid direct sunlight—it can scorch the skins. Ideal curing spots include a garage, porch, or shed with airflow.
- Step 6 Cure the onions for 2-3 weeks until the necks are dry and papery and the skins are tough. Test readiness by gently squeezing a bulb—it should feel firm and dry with no moisture inside.
After curing, it’s time to store your onions properly. Braid the green tops and hang them in a cool, dark place (like a pantry) for long-term storage. Alternatively, store loose bulbs in a mesh bag or cardboard box where they’ll stay dry and well-ventilated.
I’ve found that onions stored this way last 4-6 months without losing flavor.
Avoid these common mistakes that can ruin your harvest: harvesting too early (bulbs won’t store well), leaving soil on the onions (promotes rot), or curing in humidity (slows drying).
I once skipped curing entirely and ended up with moldy onions—don’t make my mistake! With these steps, you’ll enjoy homegrown onions that rival store-bought quality.
🧅