
How To
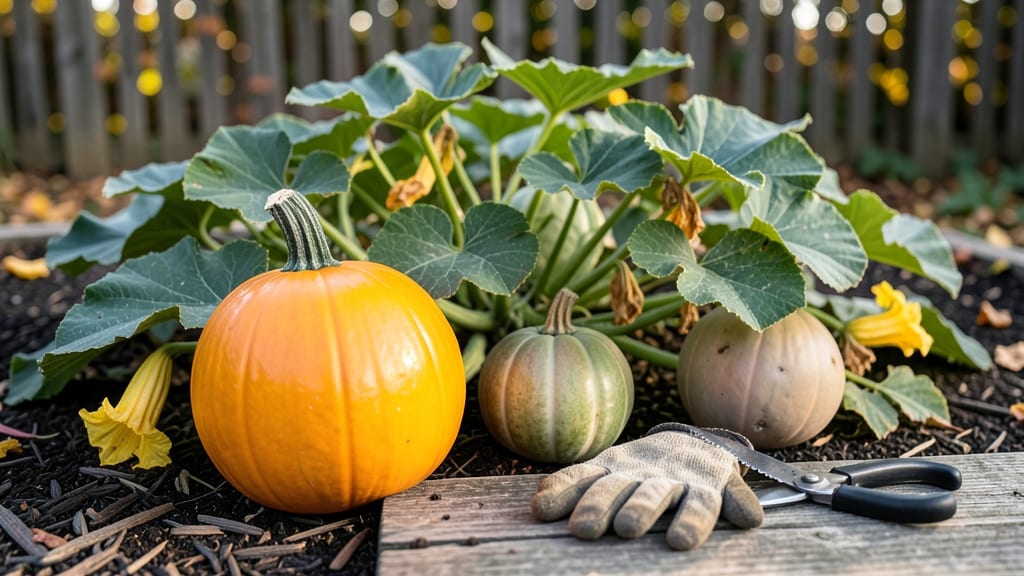
Knowing when to harvest squash 🎃 is all about watching for three key signs that tell you the moment is right—before the fruit turns tough, seedy, or overly large.
Picking squash at the perfect moment means the difference between a sweet, tender harvest and a tough, seedy disappointment—yet most gardeners miss the window every season. These three foolproof visual cues will ensure you never overlook the ideal time to pick your squash again.
Think about it: you’ve nurtured your squash plants all season, and the last thing you want is to wait too long and end up with a rock-hard rind or a vine full of oversized, unruly fruits.
The good news? You don’t need a guesswork—just a few simple checks to confirm peak ripeness.
In this guide, I’ll walk you through the three most reliable visual cues—from skin color to stem changes—and how to apply them to zucchini, butternut, and pumpkins, plus what to do if you’re still unsure. By the end, you’ll be harvesting like a pro, every time.
3 Visual cues to harvest squash at peak ripeness
There’s nothing worse than biting into a squash that’s either mealy or rock-hard—both signs you picked it too late or too early. The key to perfect squash lies in mastering these three visual cues that tell you exactly when to harvest.
I’ve learned the hard way that ignoring these signs leads to wasted effort, so let me show you how to spot them like a pro.
Most gardeners focus only on size, but that’s just one piece of the puzzle. The real magic happens when you combine skin color, stem condition, and overall dimensions.
Each type of squash—whether it’s zucchini, yellow squash, or pumpkins—has its own subtle differences, and knowing them will transform your harvest from "meh" to "magnificent."
Here’s the secret: harvest before the squash starts to decline. Once it passes its prime, flavor fades, seeds bulk up, and the texture turns rubbery.
These visual cues will help you catch it at the sweet spot—when it’s tender, flavorful, and ready for your kitchen (or your compost if you’re not quite there yet).
🌱 The 3 Foolproof Cues to Harvest Squash
Look for deep, even hues—no pale spots!
Zucchini: Bright, matte green (no yellowing)
Yellow Squash: Golden yellow, no green patches
Pumpkins: Fully developed orange or deep green (varies by type)
A dry, woody stem = perfect timing
Ready: Stem feels dry, papery, and detaches easily
Not Ready: Stem is green, flexible, and still attached tightly
Pro Tip: Twist gently—if it snaps cleanly, it’s harvest time!
Don’t wait until they’re giant—harvest early!
Zucchini: 6–8 inches long (harvest weekly to encourage more)
Yellow Squash: 8–10 inches long
Pumpkins: Full size for variety (e.g., 10–12" for small types)
Let’s talk about zucchini first, since it’s the most common squash for home gardeners. When your zucchini reaches 6–8 inches long with a deep, matte green skin, it’s time to pick. The skin should be hard enough to resist a gentle fingernail press.
If it dents easily, give it a few more days. I’ve learned that zucchini grows surprisingly fast, so checking your plants every 2–3 days prevents them from turning into monsters.
For yellow squash, the rules are similar but with a color twist. Aim for a golden yellow hue with no green patches—this means it’s ripe and ready. The stem should also be dry and papery, not green and flexible.
One trick I use is to harvest in the morning when the skin is firmer, which makes it easier to tell when it’s truly ready. Overripe yellow squash loses its sweetness and becomes tough, so don’t wait too long!
Pumpkins and winter squash like butternut or acorn require a slightly different approach because they’re harvested later in the season. Look for full color development—no pale spots—and a hard rind that’s difficult to puncture. The stem should also be dry and woody.
For pumpkins, wait until they’ve reached their mature size (check seed packets for specifics), but don’t leave them on the vine too long, or they’ll develop a tough skin and lose flavor.
One mistake I see often is harvesting by size alone. A squash might look big enough but still be underripe inside. Always combine size with skin hardness and color for the best results.
For example, a 10-inch zucchini with soft skin is overripe, while an 8-inch one with a hard rind is perfect. It’s all about balancing these visual cues to get the best flavor and texture.
If you’re growing heirloom varieties, they often stay tender longer than hybrids, so you might have a little more flexibility with timing. However, even heirlooms will eventually turn tough and seedy if left too long. My rule of thumb? When in doubt, harvest it.
You can always use slightly underripe squash in cooked dishes, but overripe squash is nearly unusable. It’s better to have a few smaller squash than one giant, tough one!
Pro tip: Use a sharp knife or pruners to harvest squash, leaving a 1-inch stem attached. This helps prevent rot and extends storage life. After harvesting, let your squash cure in a dry, shady spot for 3–5 days before storing.
This step hardens the skin further, keeping it fresh longer. Trust me, your future self will thank you when you’re not scrambling to use up a squash that
How to test squash ripeness when visual cues aren’t enough
Sometimes, cloudy skies or poor lighting make it hard to judge your squash's color or skin texture. When visual cues fail, these physical tests become your best friends.
I’ve used them myself to rescue overripe squash and avoid tough, seedy disappointments. The key is combining tactile checks with a quick look inside the fruit.
Start with the thump test, a classic gardener’s trick. Gently tap the squash with your knuckles—if it sounds hollow and dull, it’s ready. A sharp, ringing tone means it needs more time.
This works especially well for zucchini and yellow squash, where skin color can be misleading in low light.
Next, test the stem’s flexibility. Twist the stem gently near the squash—if it snaps cleanly with a slight crack, your squash is ripe. A bendy or rubbery stem means it’s not ready yet.
For heirloom varieties, stems often stay green longer, so combine this test with others for accuracy.
🔍 ⚠️ WARNING: Don’t Overlook Seed Color! 🔍
Cutting into your squash for a seed check is the ultimate test. Ripe squash seeds should be fully formed and plump, not shriveled or pale. For hybrid varieties, seeds may be sterile, but their color (deep tan or brown) still signals readiness. If seeds look underdeveloped, leave the squash on the vine another 2-3 days—but check daily to avoid overripening.
Adjust your approach based on the squash type. Butternut squash and acorn squash often need a firmer touch—wait until the stem dries completely before harvesting. Meanwhile, pumpkins should have a hard rind that resists fingernail pressure, even if the stem is still green.
For heirloom varieties, like Blue Hubbard, trust the weight more than size. A ripe heirloom squash feels surprisingly heavy for its size. If it’s light for its dimensions, it’s likely underripe. Always harvest heirlooms before they reach maximum size—they soften quickly once picked.
Pro tip: Keep a harvest journal to track which tests work best for your climate. In humid summers, squash ripen faster, so rely more on the stem twist and seed check. In dry heat, the thump test becomes more reliable as the fruit hardens quicker.