
Vegetables
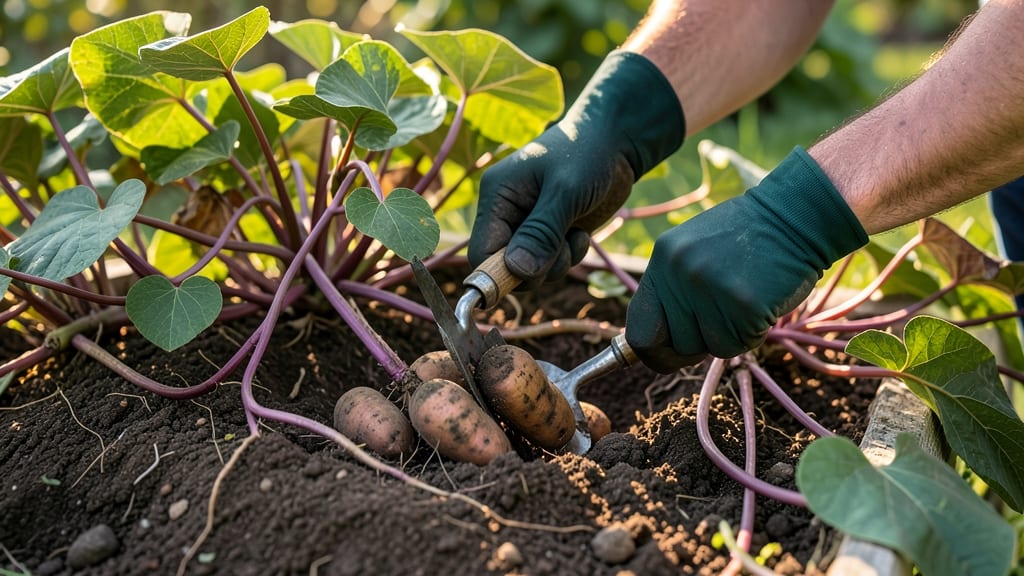
Ready to harvest sweet potatoes pictures 🍠 are your best guide to knowing when those tubers are finally perfect—because harvesting too early means tough, underdeveloped roots, while waiting too long risks shriveling.
Picture this: your sweet potato vines are turning a crisp yellow, the leaves are curling like pages in an old book, and the soil feels loose when you poke it. These are the telltale signs that your harvest is just days away—but how do you really know for sure?
Beyond the color of the foliage, the key lies in the soil and the size of the tubers. A firm, thick-skinned sweet potato that’s 3-4 inches in diameter is your goal. Too small? They’ll lack sweetness. Too large? They might crack or dry out.
In this guide, I’ll walk you through the visual cues—like leaf yellowing and vine dieback—and the hands-on checks (yes, digging is involved) to confirm your sweet potatoes are ready. Plus, I’ve included real-life photos so you can compare your garden’s progress to the pros.
How to identify sweet potatoes ready to harvest using leaf color & growth signs
Sweet potatoes send clear visual signals when they're ready to harvest, but many gardeners miss these cues. The most reliable indicators focus on leaf color changes and vine maturity. Unlike regular potatoes, sweet potatoes don't produce visible tops underground, so you must rely on aboveground clues.
I've grown them for years, and I can tell you—ignoring these signs often leads to small, fibrous tubers or overripe, woody roots.
In cooler climates like USDA Zone 6a, sweet potatoes typically mature between 90-140 days after planting, but timing varies based on variety and weather. For example, my 'Beauregard' plants usually signal readiness in early October, while 'Georgia Jet' may be ready a week earlier.
The key is watching for three primary visual cues: leaf yellowing, vine dieback, and soil firmness around the base.
Here's where many gardeners go wrong—they assume sweet potatoes are ready just because the plant looks mature. But premature harvesting leads to underdeveloped tubers that lack sweetness. The best time to harvest is when 50-70% of the foliage has turned yellow and started to die back.
This indicates the plant is redirecting energy from leaves to tuber development below ground.
Climate plays a huge role in harvest timing. In hot, humid regions, sweet potatoes may mature faster due to accelerated growth, while cooler areas might need an extra 2-3 weeks. For instance, my friend in Florida harvests by mid-September, while I wait until late October in my Zone 6a garden. Always adjust your expectations based on your local growing season.
One of my biggest mistakes was harvesting too early because the leaves were still mostly green. I ended up with tiny, watery tubers that lacked sweetness. Since then, I've learned to wait until at least 50% of the leaves turn yellow.
Pro tip: Gently tug on a vine—if it pulls away easily, the tubers are likely still developing. If it resists, that's a good sign they're ready.
Another critical clue is the skin thickness. Ready-to-harvest sweet potatoes have thick, tough skin that resists your fingernail when pressed. Early harvests will have thin, papery skin that pierces easily.
I test this by gently pressing my thumb against the exposed tuber—if it leaves no mark, it's not ready yet.
Don't forget to check for visible tuber tops in the soil. When sweet potatoes are mature, their shoulders often break through the soil surface. This is nature's way of telling you it's time to dig.
In my garden, I see this sign about 1-2 weeks before full leaf yellowing, which gives me a heads-up to prepare my harvesting tools.
Climate affects harvest timing dramatically. In hot, dry regions, sweet potatoes mature faster due to stress responses that trigger tuber development. Meanwhile, in cooler climates, they take longer to signal readiness.
My neighbor in Arizona harvests by mid-August, while I wait until October. Always adjust your expectations based on your local weather patterns.
One final tip: If you're unsure, do a partial harvest test. Carefully dig up one plant and check the tubers. If they're small and underdeveloped, give the remaining plants another 1-2 weeks. This method saved me from harvesting too early last season—my test plant revealed
Step-by-step soil looseness check: the hidden sign your sweet potatoes are harvest-ready
While leaf yellowing and vine dieback are clear signs, the real secret to harvesting perfectly ripe sweet potatoes lies beneath the soil. A soil looseness check reveals whether your tubers have reached ideal size and firmness.
Digging too early risks small, underdeveloped roots, while waiting too long can lead to cracked or rotted tubers. This simple test ensures you harvest at peak flavor and texture.
The key is gentle probing—not full excavation. By testing soil firmness and tuber visibility, you’ll avoid damaging roots while confirming readiness. I’ve used this method for years, and it’s saved my harvests from both premature digging and overripe disappointments.
Let’s break it down into clear, actionable steps with visual cues to guide you.
🌱 Step-by-Step Soil Looseness Check
- 1 Choose a representative plant. Select a healthy vine with yellowing leaves (not fully dead). Avoid plants with pests or disease.
- 2 Gently loosen soil with a trowel or hands. Work in a small circle (6-8 inches wide) around the base of the vine. Stop when you hit 2-3 inches deep.
- 3 Probe for tubers. Use your fingers to feel for rounded shapes. Ideal tubers should be 2-3 inches in diameter and firm to the touch. Small tubers (<1 inch) need more time.
- 4 Check soil firmness. Press your thumb into the soil around the tuber. It should feel slightly compact but not hard. If soil is loose, tubers may still grow. If rock-hard, they’re overripe.
- 5 Inspect skin thickness. Gently brush away soil to expose a small patch of tuber skin. Ready tubers have thick, tough skin that resists tearing. Thin skin means they’re not ready.
- 6 Verify tuber visibility. If 20-30% of the tuber is visible above soil, it’s harvest-ready. Buried tubers may still need 1-2 weeks. Over-exposed tubers risk cracking.
- 7 Harvest with care. Use a fork or hands to lift tubers, leaving 1-2 inches of soil attached. Cure immediately in warm (80-85°F), humid conditions for 10 days.
One of the biggest mistakes I’ve seen is digging based solely on leaf color. Yellow leaves can signal readiness, but they can also mean disease or drought stress. Always combine leaf checks with this soil test for accuracy.
For example, last year my Beauregard variety had yellowing leaves at 100 days, but the soil test revealed tubers needed 2 more weeks to reach ideal size.
If your soil feels too loose during probing, your tubers likely need 10-14 more days of growth. Loose soil indicates they haven’t yet pushed against the earth to develop firmness.
On the flip side, if the soil is rock-hard, your sweet potatoes may have overstayed their welcome and are at risk of cracking or rotting. In this case, harvest immediately to salvage what you can.
For container-grown sweet potatoes, adapt this method by gently removing the plant from its pot and inspecting the roots through the drainage holes. Look for well-developed tubers that fill at least half the pot volume.
If roots are cramped, they’ll be small and underdeveloped, no matter how yellow the leaves appear.
Remember, the goal is to balance size and firmness. A tuber that’s large but soft is overripe, while a small but firm tuber is underripe. By mastering this soil check, you’ll consistently harvest sweet potatoes with the perfect texture and sweetness—every single time. 🍠