
How To
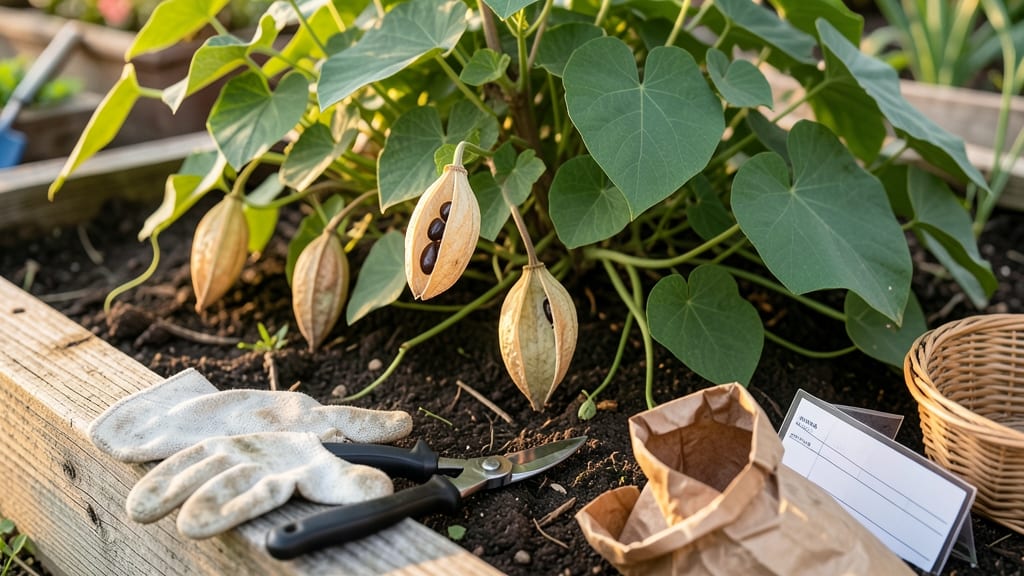
Harvesting moonflower seed pods at the right time ensures you save seeds for next year’s ethereal white blooms 🌙 — and missing that window means watching your hard work scatter to the wind.
Picture this: you’ve spent months nurturing your moonflower vines, only to wake up one morning and find the pods split open, seeds spilling onto the soil. That’s the moment you realize timing matters more than you thought.
The difference between a successful seed harvest and a lost one often comes down to knowing when those pods are truly ready.
Moonflower seed pods reach their prime in late summer to early fall, when they turn golden brown and develop tiny cracks. A dry rattle when shaken is your green light—ignore it, and you risk harvesting too early (green pods = no seeds) or too late (rotted seeds).
In USDA Zone 6a, aim for August through September, but watch for the first frost creeping in by October.
Below, I’ll walk you through the exact cues to spot, how to collect seeds without damage, and what to do if you’ve already missed the window. No more guessing—just a foolproof way to save your moonflowers for years to come.
How to identify the perfect moonflower seed pod harvest window
Moonflower (Ipomoea alba) seed pods are nature’s time capsules—each one holding the potential for next year’s enchanting blooms. But timing your harvest wrong means losing those seeds to either premature scattering or moldy overripeness.
The key lies in three visual and tactile cues: golden-brown cracks, a dry rattle, and the pod’s natural readiness to release seeds. Mastering these signs ensures you collect viable seeds at their peak.
First, focus on the pod’s color transition. Immature pods start green and firm, signaling they’re not ready. As they mature, they develop golden-brown streaks along their seams—this is your first warning that harvest time is near.
Ignore pods that remain uniformly green, as they’ll never produce viable seeds. Instead, target those with 50-70% brown coverage.
Next, perform the dry rattle test: Gently shake a pod over a brown paper bag. If it emits a hollow, papery sound, the seeds inside are fully developed and ready.
A muffled thud means the pod is still too moist. This tactile check is foolproof—no guesswork involved. I’ve missed harvests before by skipping this step, so don’t make the same mistake!
Finally, examine the pod’s structural integrity. Ripe moonflower pods develop natural cracks along their seams, often splitting open slightly at the edges. These fissures aren’t a flaw—they’re a sign the pod is actively releasing seeds.
If you see seeds spilling out, act immediately, as they’ll scatter quickly. Overripe pods, meanwhile, may appear completely brown and brittle, but their seeds often lose viability.
| Pod Stage | Color | Texture | Sound Test | Seed Viability | Action |
|---|---|---|---|---|---|
| Underripe | Green | Firm, moist | Muffled (no sound) | Low (seeds undeveloped) | Wait 1-2 weeks |
| Perfectly Ripe | Golden-brown (50-70%) | Dry, papery, slight cracks | Hollow rattle | High (90%+) | Harvest immediately |
| Overripe | Uniform brown | Brittle, crumbly | Empty or scattered seeds | Low (seeds may sprout poorly) | Collect if seeds remain |
Regional timing matters too. In USDA Zone 6a, aim to harvest moonflower seed pods between late August and early September, before the first frost. In warmer zones (7b+), pods may ripen as late as October.
Watch your local frost dates—if a hard freeze is forecasted, harvest even if pods aren’t fully brown, as frost will kill the vine and scatter seeds prematurely.
Morning is the best time to harvest. Pods are driest after overnight dew evaporation, making them easier to handle. Avoid harvesting after rain, as excess moisture can cause mold growth on seeds.
I once waited until afternoon to collect pods, only to find them damp and unusable—learn from my mistake!
Pro tip: Place harvested pods in a paper bag (not plastic) to allow airflow while they finish drying indoors. If you’re unsure about a pod’s readiness, err on the side of harvesting early.
Seeds left too long in the pod will scatter, but underripe pods can still dry out and yield seeds if stored properly. Just don’t expect the same germination rates as perfectly timed harvests.
Finally, distinguish between ripe pods and those ready to split. A ripe pod will release seeds when lightly squeezed, but its seams won’t burst open violently. Overripe pods, however, may explode when touched, sending seeds flying.
If you hear a loud pop, you’ve waited too long—collect what seeds remain and store them immediately.
With these cues, you’ll never miss the golden-brown harvest window again. Happy seed hunting—your future moonflowers will thank you! 🌙✂️🌱
Step-by-step guide to harvesting and storing moonflower seeds
Once you’ve spotted those golden-brown moonflower seed pods, timing your harvest correctly ensures you collect viable seeds for next season’s garden. The key is acting before the pods split open naturally and scatter their seeds—yet not so early that the seeds inside are still immature.
I’ve learned the hard way that waiting too long means losing your harvest to squirrels or rain, while harvesting too soon guarantees seeds that won’t sprout.
Grab a pair of pruning shears or clean scissors and work on a dry, sunny day to preserve seed quality. Avoid harvesting after rain, as moisture can accelerate rot in the pods.
I always wear gloves to protect my hands from the vines’ mild irritants, which can cause skin reactions if you’re sensitive. The goal is to collect pods when they’re fully mature but still intact—this is your ideal harvest window.
- 1 Wait for pods to turn golden-brown—they’ll look dry and papery, not green or moist. Shake a few: if they rattle loudly, they’re ready.
- 2 Harvest pods in the morning after dew has dried. Use clean shears to cut the entire pod from the vine, leaving a small stem attached to prevent seeds from spilling.
- 3 Dry pods indoors for 1–2 weeks in a well-ventilated area (like a mesh bag hanging in a dry, dark spot). Avoid direct sunlight, which can overheat them.
- 4 Crack open dried pods over a tray or paper to collect seeds. Store them in a paper envelope or airtight container with a silica gel packet to prevent moisture damage.
After harvesting, I always label my seed packets with the harvest date and store them in a cool, dark place (like a pantry or seed fridge). Moonflower seeds can stay viable for 2–3 years if stored properly, but I’ve found they germinate best when used within the first year.
For extra protection, I seal them in a mylar bag with an oxygen absorber to extend their shelf life.
If you’re in a humid climate, speed up the drying process by placing pods in a dehydrator at 95°F (35°C) for 2–3 hours. This mimics the natural drying process but cuts down on the waiting time.
Just be sure to monitor them closely—over-drying can make seeds brittle and less likely to sprout. I’ve had the best luck with seeds that still feel slightly plump but are completely dry to the touch.
One pro tip I learned from a fellow gardener: if you’re unsure whether your pods are ready, squeeze them gently. A ripe pod will feel light and hollow, almost like a dried husk.
If it’s still firm or heavy, give it another week. Patience here pays off—waiting for the perfect moment means a higher germination rate when you’re ready to plant next spring.
Finally, don’t forget to save a few pods for direct sowing in your garden. Moonflowers self-seed easily, but harvesting your own seeds ensures you’re growing the exact variety you love.
Just scatter them in well-draining soil after the last frost, and you’ll have a fresh batch of moonflowers blooming come summer.